Mounting/Finishing Needlework Ready for Display
Mounting/Finishing Needlework Ready For Display
The instructions will show you how to mount a piece of needlework or fabric onto a piece of acid free board ready for framing, making into a needle case, or for covering a lid or panels of a box.
If you are cutting the board for the needlework to go into a frame, ensure that the board fits inside of the frame with a little space around the board to allow for the fabric that will go around the edges of the board.
The instruction will show you three methods for mounting a piece of needlework:
Lacing method on a square or rectangle board
Lacing method on a hoop or round board
Glueing method on a square or rectangle board
The benefit of mounting your own needlework is to ensure that the work is mounted properly using acid free board and materials that will not harm the embroidery. The other benefit of mounting your own needlework is that it is more cost effective as you do not have to pay someone to finish the needlework for you and if you are framing the needlework you can purchase pre-made frames which is more cost effective.
A lot of my needlework designs that I sell fit well in 8 inch by 10 inch pre-made frames.
Supplies Needed:
4 ply (1/16th of an inch) or 8 ply (1/8h of an inch) Acid Free Board or Acid Free Foam Core: Use 4 ply for small needlework pieces, use 8 ply board for large pieces of needlework – you can glue two pieces of 4 ply board together if you require a more sturdy board and do not have 8 ply. It is best that the entire core of the board is acid free and not just the surface. Acid free foam core can also be used. Acid free board or foam core can be purchased from good art stores, craft stores or art framers. The board should be acid free through the entire board as the acid in regular board can leach into the fabric and threads and rot them over time.
Ruler and Utility Knife: To measure and cut the acid free board.
Strong Sewing Thread: Such as upholstery thread for the lacing.
Scissors
Chenille Needle: To work the herringbone lacing stitches.
Dress Making Pins with Large Heads: To position the fabric onto the frame.
Craft Tacky Glue: That dries clear for glueing on batting or mounting fabric.
The lacing method is one of the best methods for mounting needlework as it can ensure that the needlework is properly positioned on the board without puckers and wrinkles and if the needlework is not in the proper position on the board, it can easily be taken off and repositioned and re-laced without ruining the needlework. The needlework is also not going to deteriorate over time in comparison to using staples or glue that can mark the fabric.
Cut a piece of acid free board for your needlework to be mounted onto. In the example below a 4 ply acid free board was used for an needlework size 5 ½ inch wide by 4 inch high.
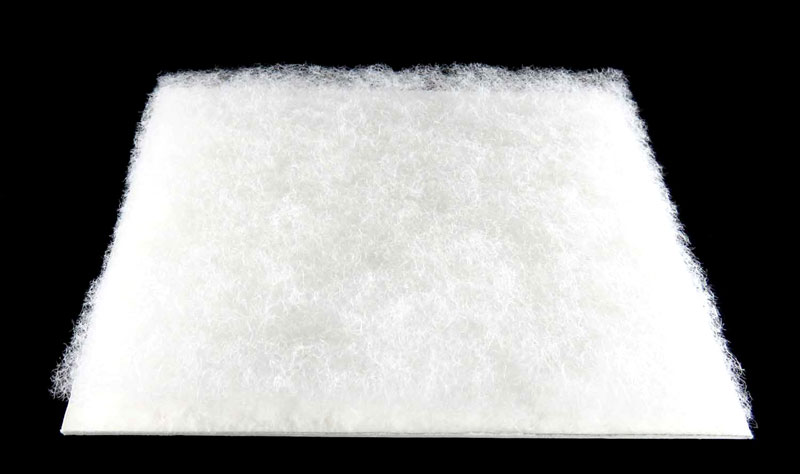
Optional: Glue a piece of batting (wadding) to the board if you would like the mounted needlework to have a padded feel. This is effective for the covers of needle cases or panels for boxes and if you have a lot of lumpy ends at the back of the needlework such as goldwork needlework as the ends will sink into the batting giving the surface of the needlework a smoother/more even appearance.
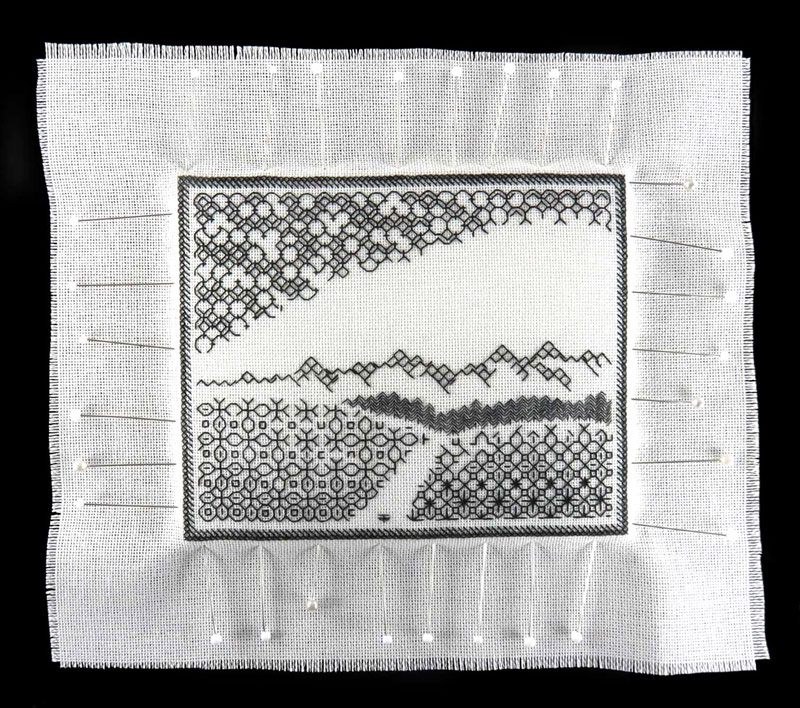
PPlace the needlework over the board making sure that the needlework is positioned nicely on the board and covers the batting side (if you are using batting). Leave 1 inch to 3 inches of fabric around the edge of the board depending on the size of the needlework. A smaller board will require less fabric as there is less room for the lacing.
Using dress making pins with large heads pin the fabric to the edge of the board starting on one side of the board at the center and pin out to the corners. If you have a ground fabric underneath your needlework fabric, pin both fabrics to the board at the same time.
Place the pins about ½ an inch (1 ¾ cm) apart regardless of the size needlework you are pinning to the board, to ensure there is enough even tension across the board. The pins do not have to go far into the edge of the board as they are only there to hold the needlework in the desired position at the desired tension for when the lacing is being worked and will be removed afterwards.
Pin the fabric to the opposite side of the board starting at the center and working out to the corners pulling the fabric tight and then repeat for the other two sides.
Check that the needlework is nicely positioned on the board with no wrinkles or puckers before you start lacing the back. Reposition the needlework if necessary.
Cut a very long piece of upholstery thread, you can use a single thread if it is very strong or double as in the example below. If you are using the thread double, thread one end of the upholstery thread into a large sharp needle such as a chenille needle. Slide the needle to the center of the thread and then double the thread. Knot the two ends of the thread together.
Fold one side of the fabric to the back of the board (it does not make a difference which edge you start on) and start the thread in the fabric on one side of the board, work a running stitch through the fabric for about 1/4 of an inch (6 mm) long.
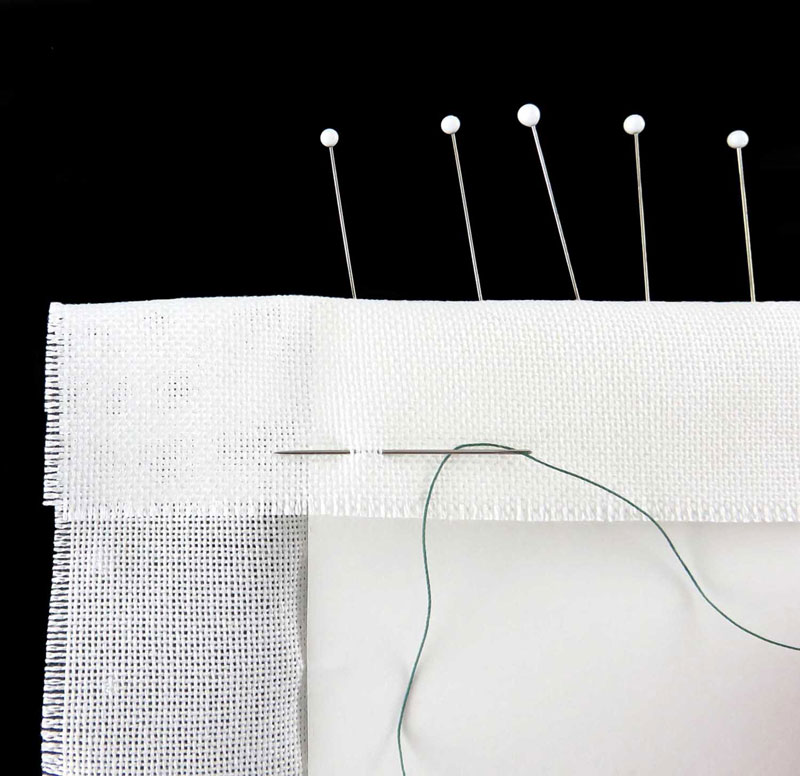
Work two back stitches in one location to anchor the thread.
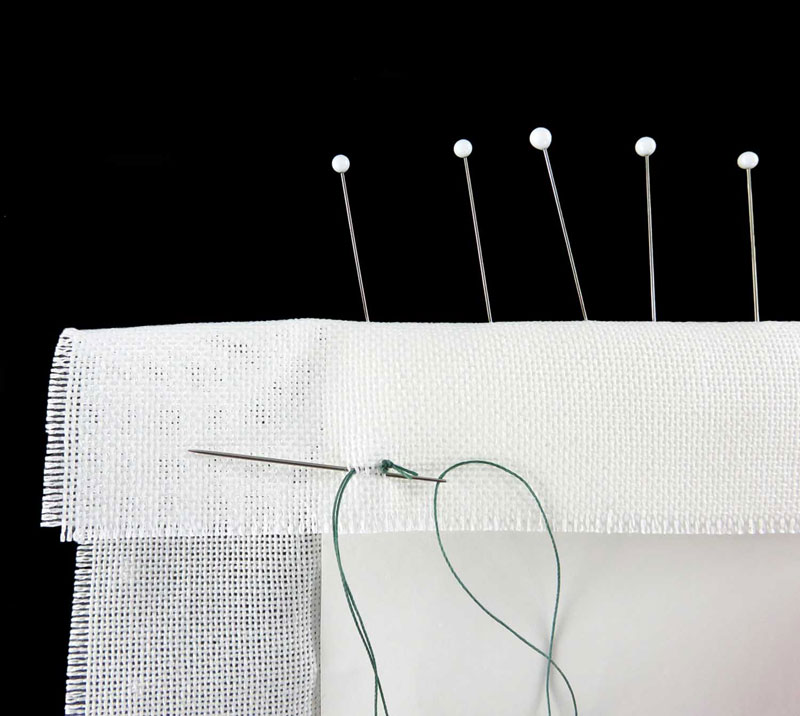
Take the needle and thread across the board to the fabric strip on the other side of the board and work a back stitch through the fabric for a length of about 1/4 of an inch (6 mm) long. Pool the thread at the center of the board so that it is less likely to catch on the dress makers pins.
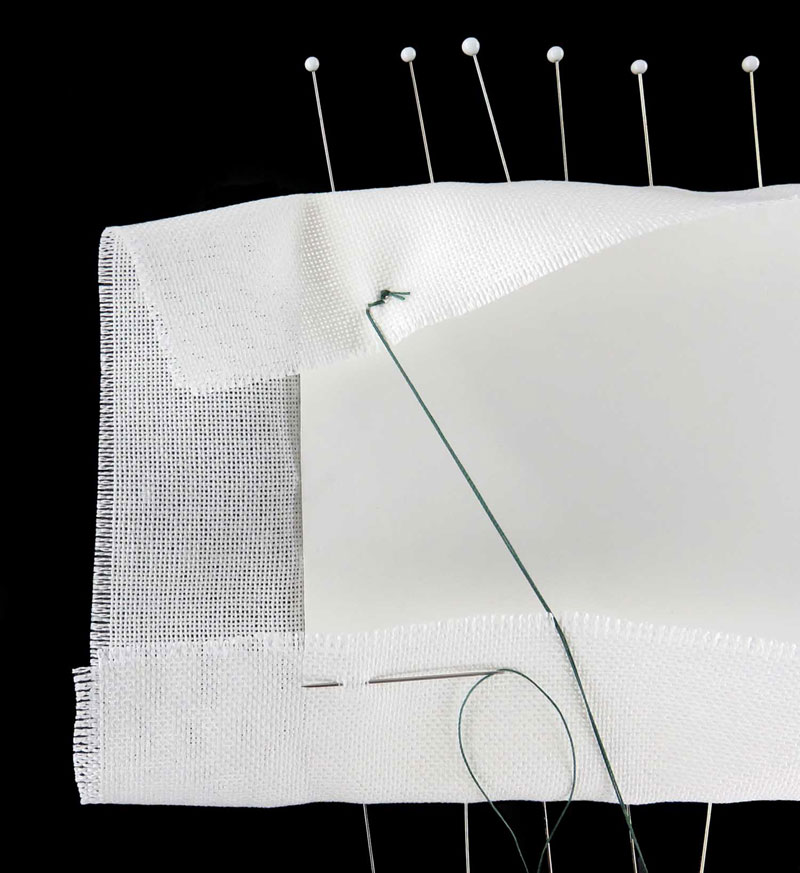
Take the needle and thread back to the other side and work a back stitch about 1/4 of an inch (6 mm) long to the right of the previous stitch.
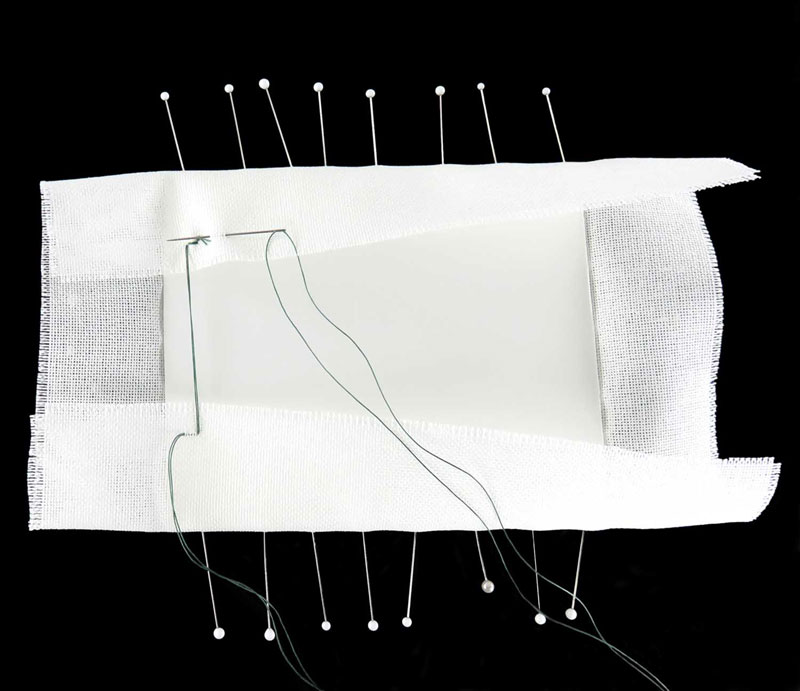
Continue switching back and forth from one side of the board to the other side of board working a back stitch through the fabric.
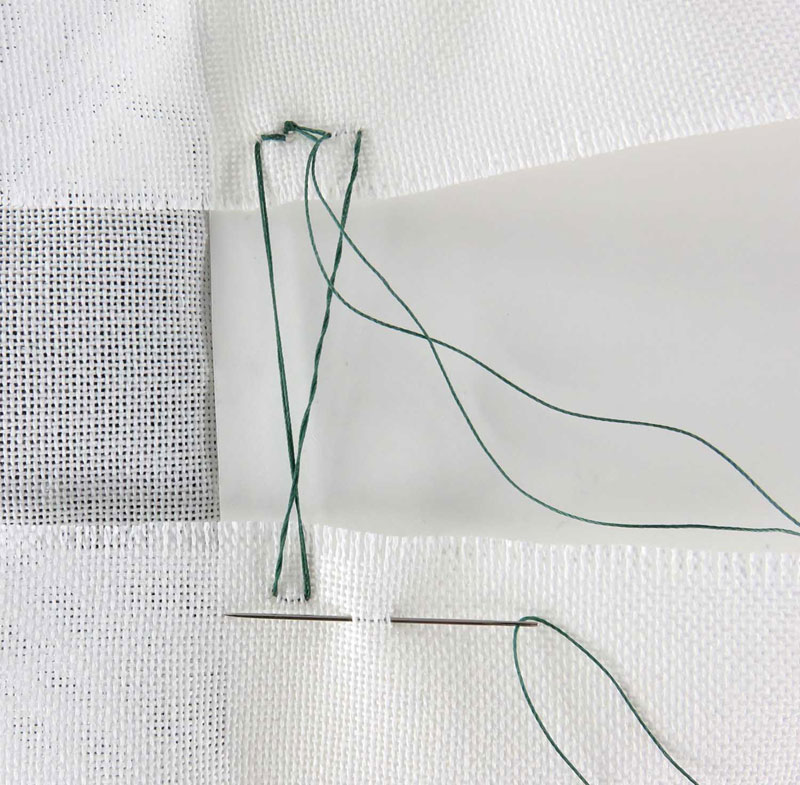
The back stitches do not have to be worked at the same height. It is better to vary the positioning of the stitches so that the stitches do not pull excessively on one thread of the fabric.
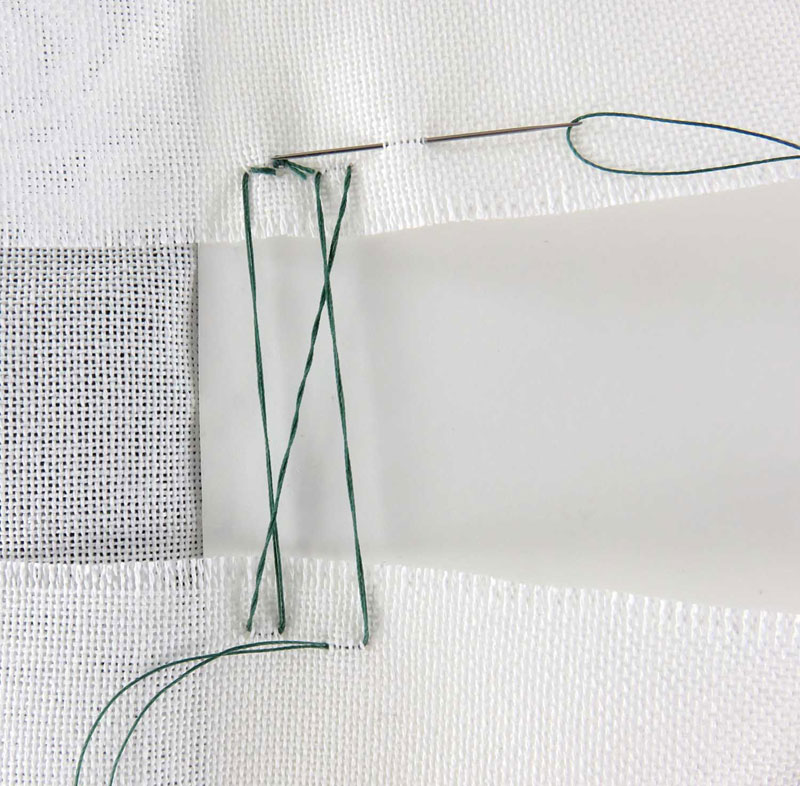
When the thread is crossed over the previous stitch a herringbone effect is created. Pull the stitches very tight as you are working.
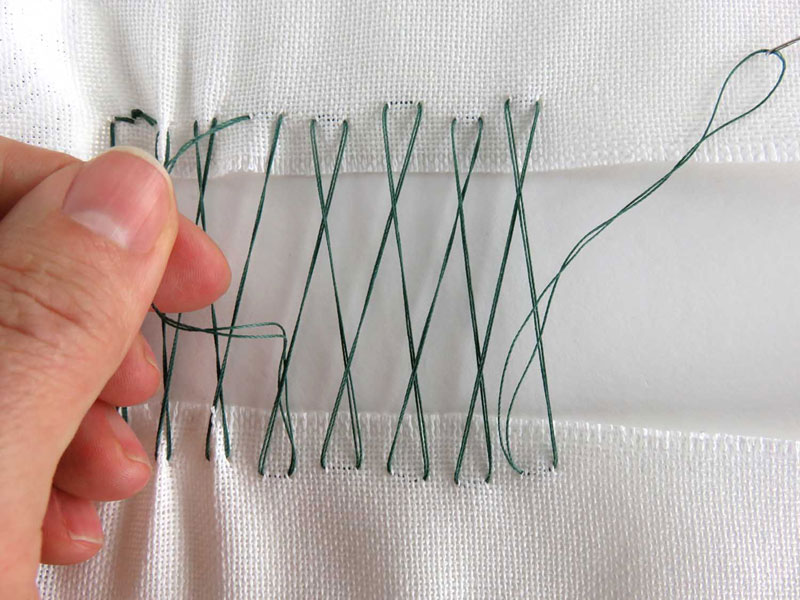
When you start running out of thread, go back to the first stitch and pull the stitch and consecutive stitches tight pulling up any slack and then you will find you will have more thread to work with.
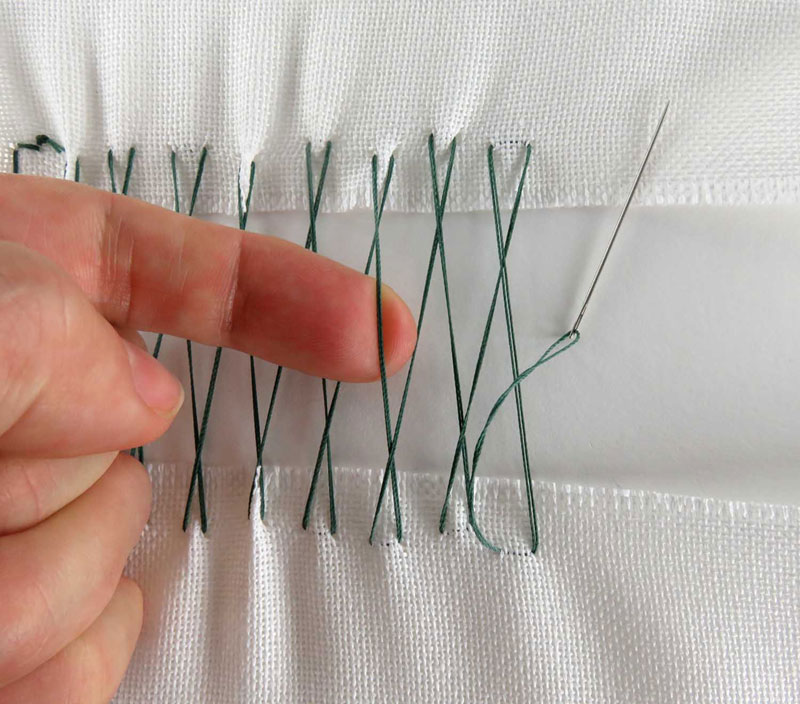
If you run out of thread as you are working across the board, do not finish the thread off but take the needle off the thread and pull the stitches really tight.
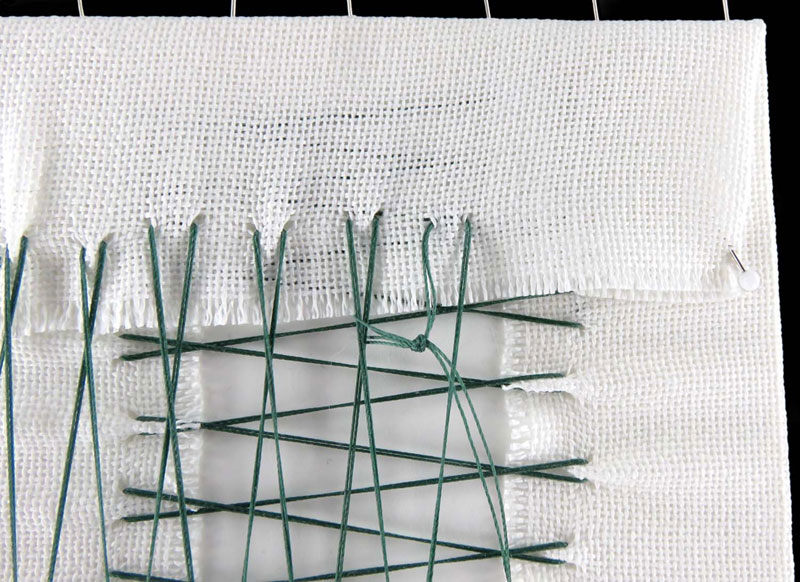
Cut a new length of thread, thread the needle and then tie the end(s) of the new thread to the end(s) of the thread of the herringbone stitch with a couple of secure knots close to where the last stitch was made.
Always pull the herringbone stitches tight before knotting the old and new threads together otherwise when you tighten the herringbone stitches the knot may end up by the fabric and you can’t pull the stitches tight.
You may have to start a new thread several times when lacing the fabric to the board if you are lacing a large project.
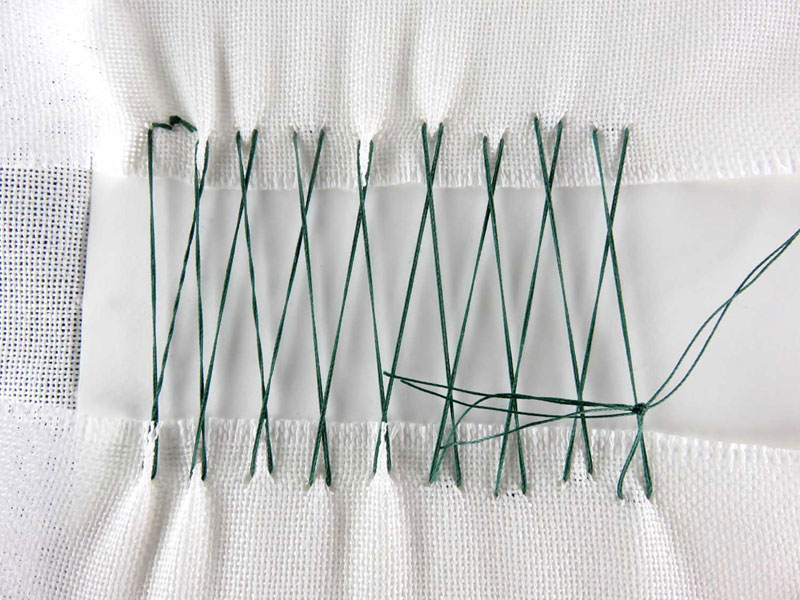
Trim off the tails of the thread by the knot.
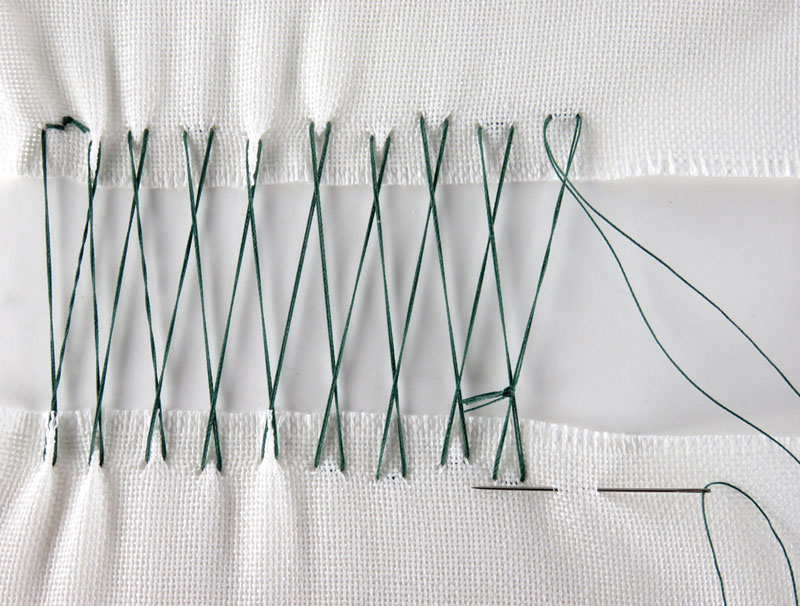
Continue working the lacing/herringbone stitches to the side of the board.
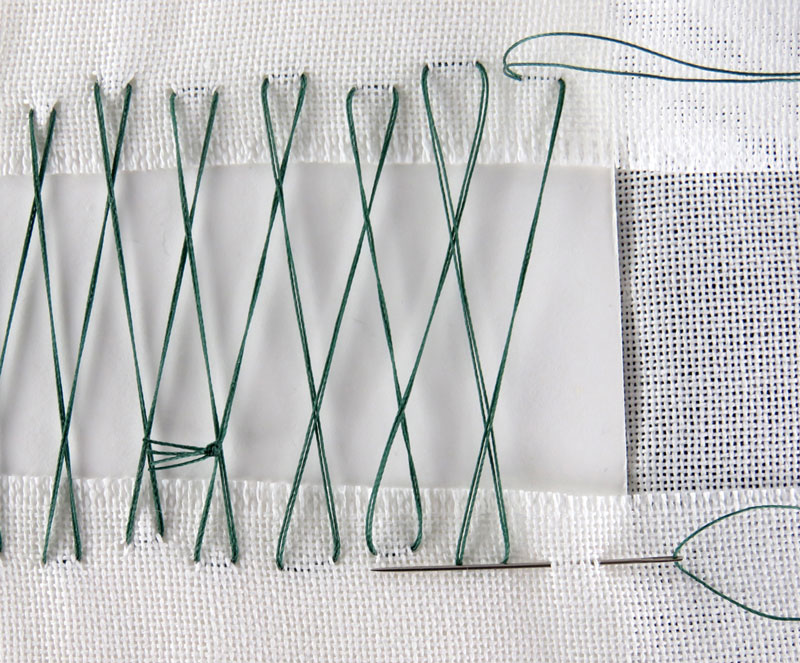
Tighten the herringbone stitches at the back of the work before finishing the thread off.
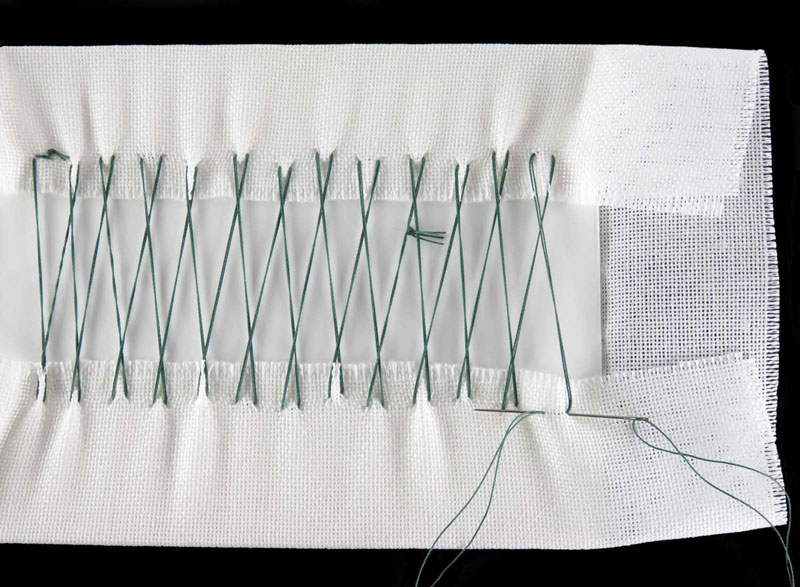
The herringbone lacing stitches should be very tight like guitar strings.
Work two or three back stitches to anchor the thread.
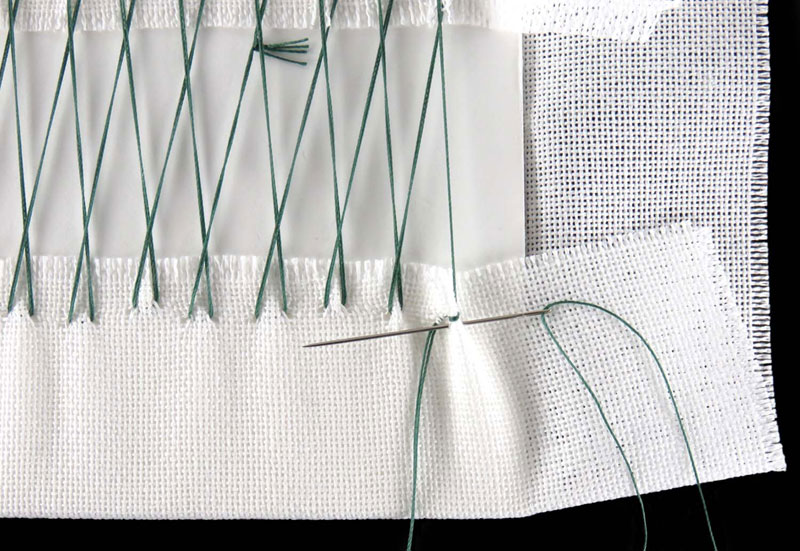
Once the anchoring back stitches have been worked, cut the thread and you can remove the pins along the top and bottom edge of the board.
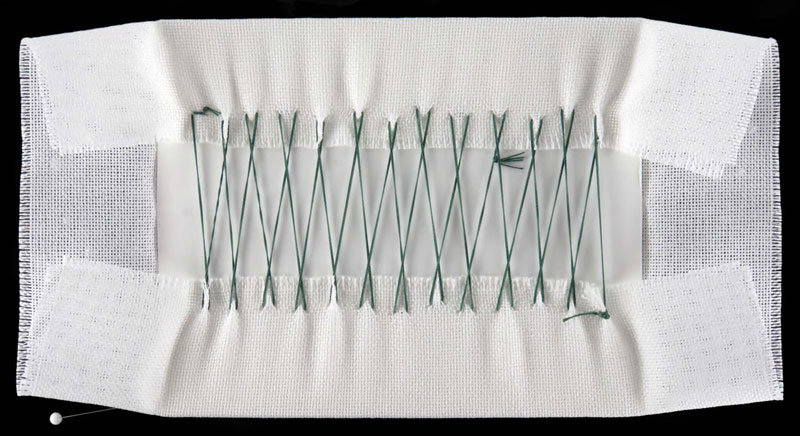
The needlework design on the front should be well positioned on the board and the fabric should be tight with no wrinkles or puckers. If some of the pins have fallen out on the sides of the board, put the pins back in place before lacing the other two sides.
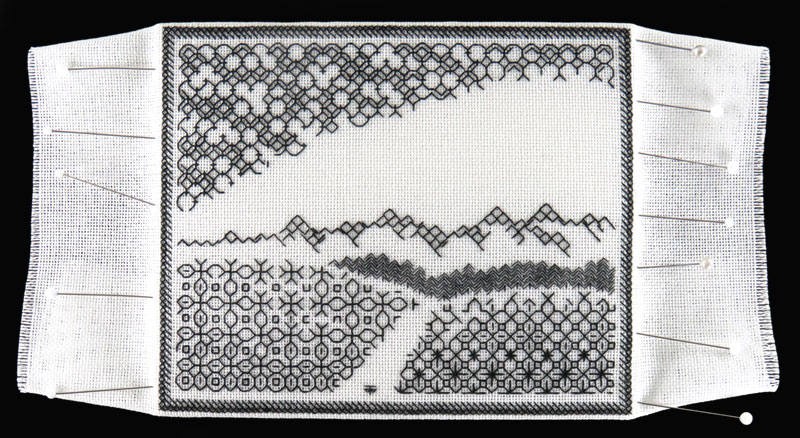
On the back, fold under the fabric edges at the corners of the board.
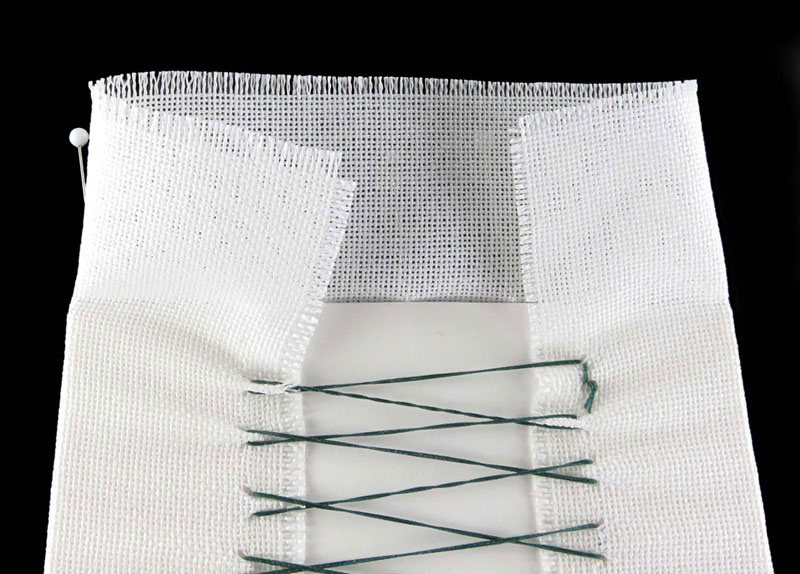
Start a new thread with a knot at the end and work a back stitch through all the layers of fabric at the side of the board for a length of about 1/4 of an inch (6 mm) long.
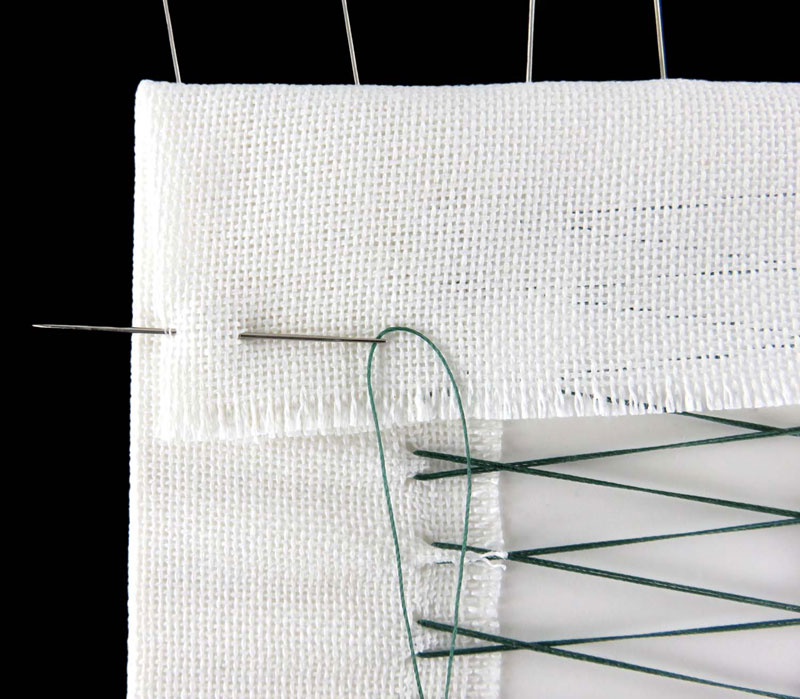
Work another back stitch through all the layers of fabric to secure the thread.
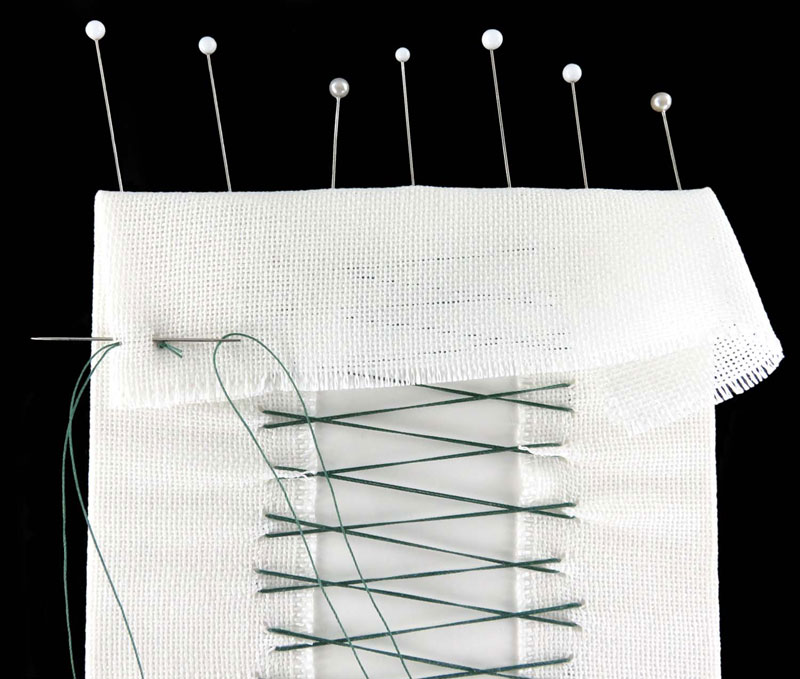
Take the needle and thread across the board to the fabric strip on the other side of the board and work a back stitch through all the layers of fabric at the side of the board for a length of about 1/4 of an inch (6 mm) long.
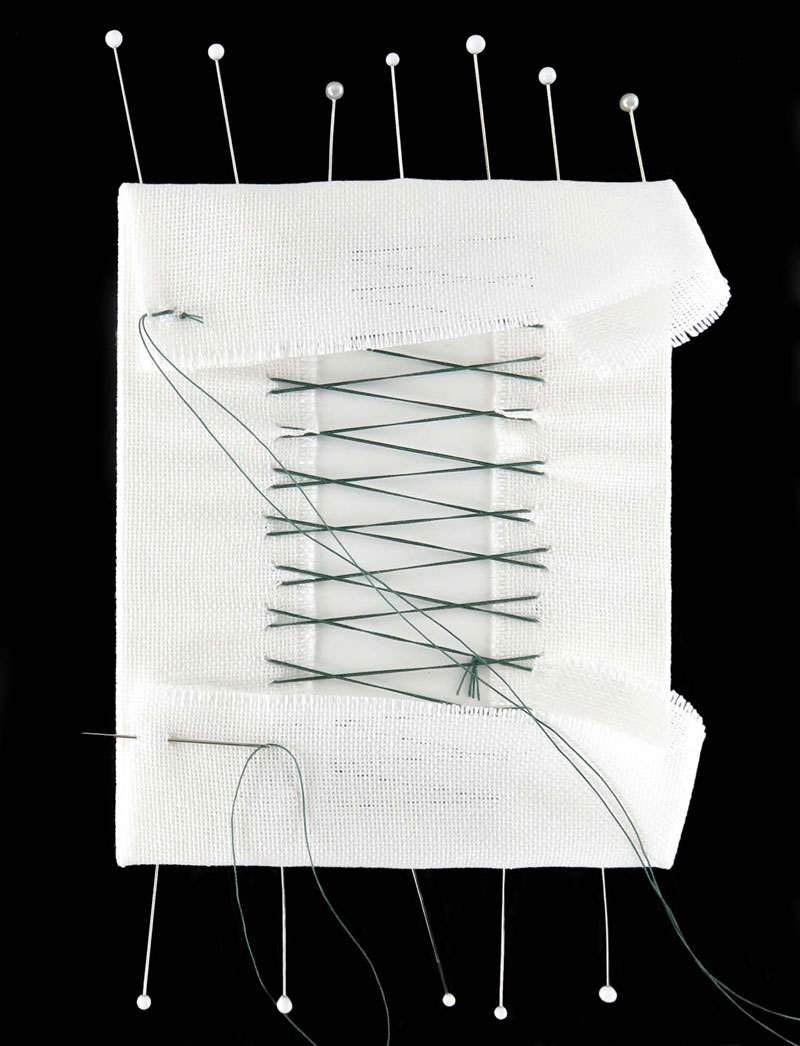
Take the needle and thread back to the opposite side and work another back stitch about 1/4 of an inch (6 mm) long to the right of the previous stitch. On this stitch and consecutive stitches, stitch through the top layer of fabric only until you get to the right side of the board.
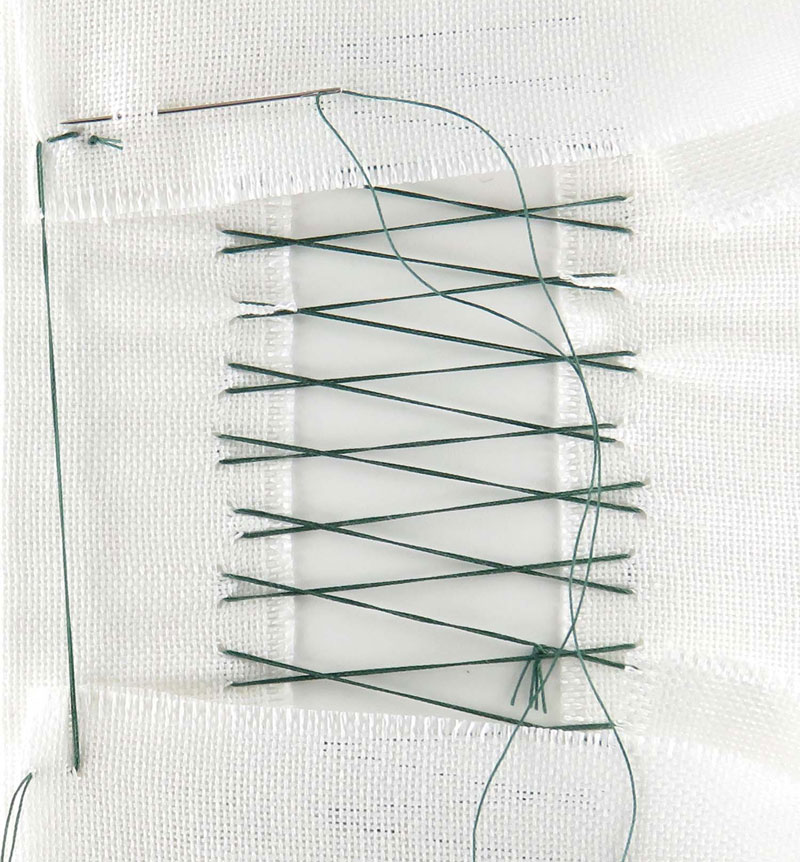
Continue switching back and forth from one side of the board to the other side of board working a back stitch through the fabric. The back stitches do not all have to be worked at the same height. It is better to vary the positioning of the stitches so that the stitches do not pull excessively on one thread of the fabric.
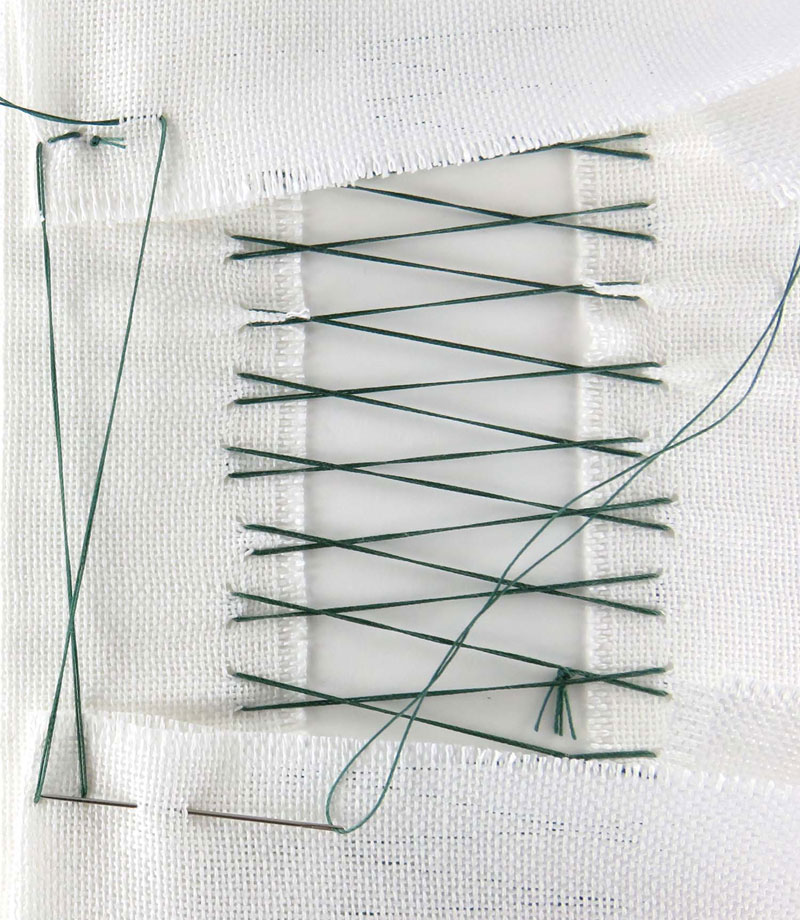
Pull the stitches very tight as you are working.
When you start running out of thread, go back to the first stitch and pull the stitch and consecutive stitches tight, pulling up any slack and then you will find you will have more thread to work with.
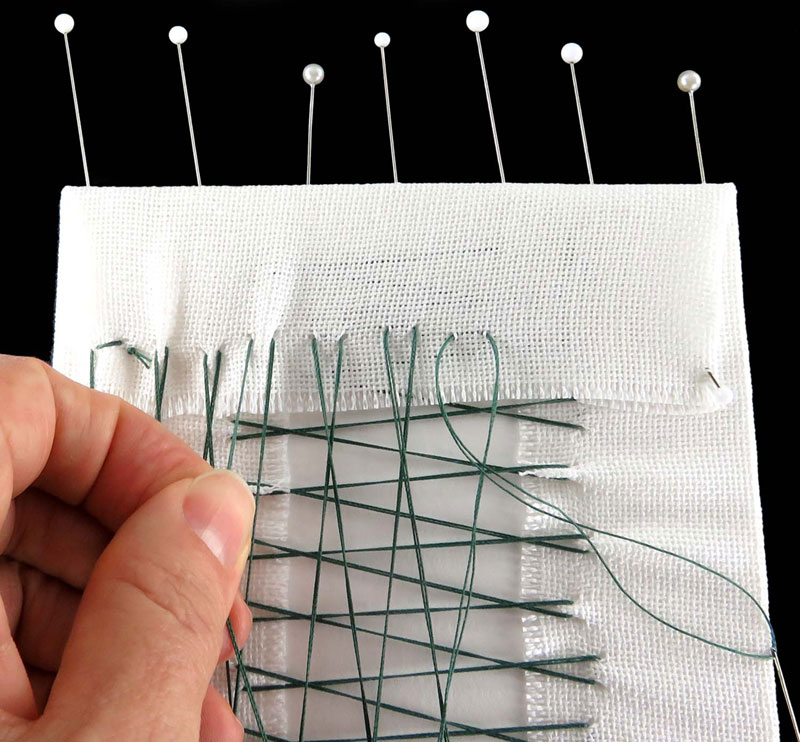
If the thread runs out, join a new thread as explained above.
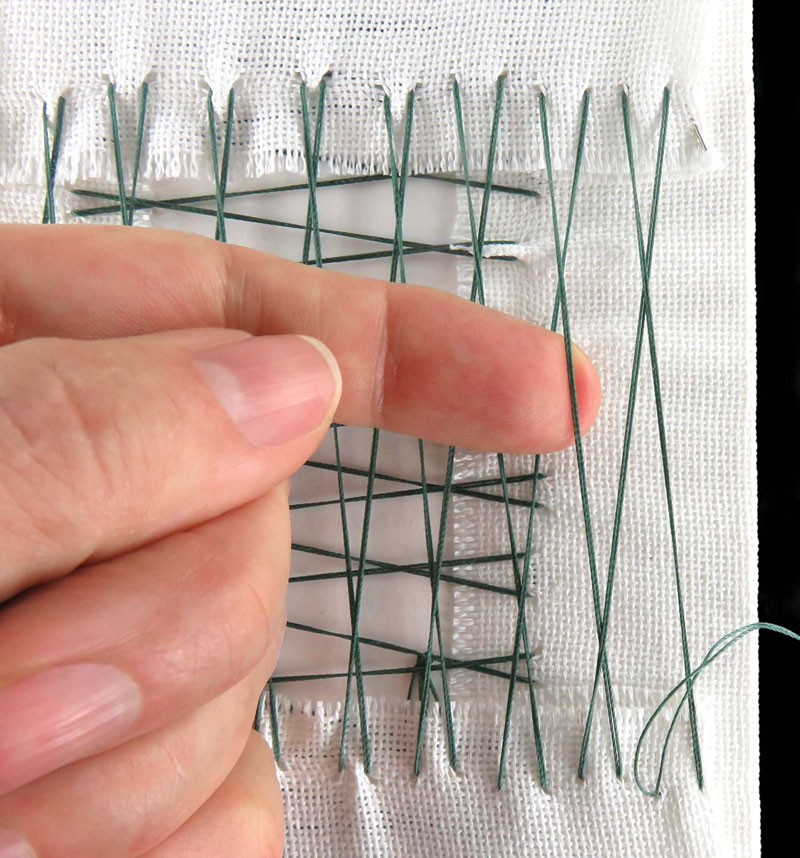
Work the herringbone stitch to the other side of the board working the back stitch at the bottom corner through all layers of the fabric and then tighten the stitches.
Work a back stitch at the top through all layers of the fabric.
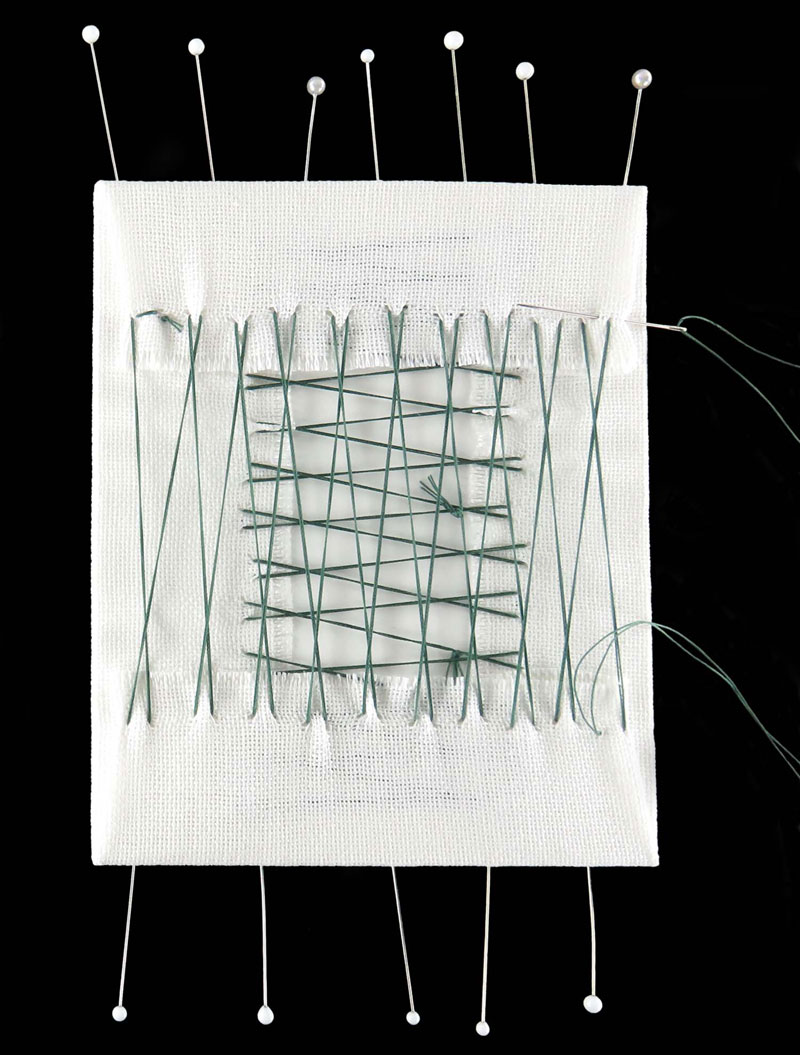
Work another back stitch on top through all layers of the fabric.
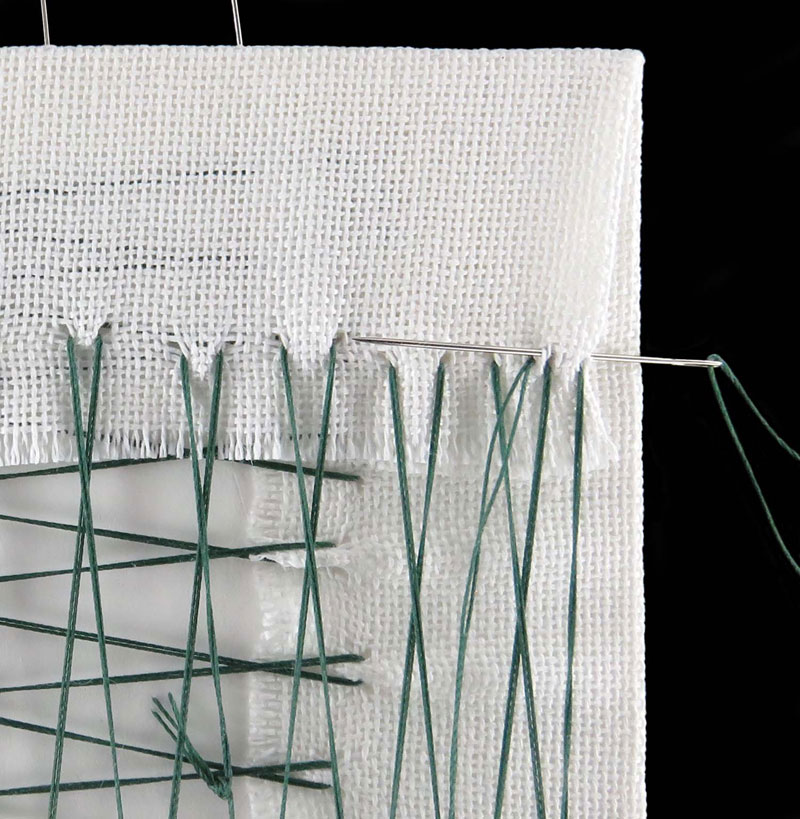
Work another back stitch on top through all layers of the fabric.
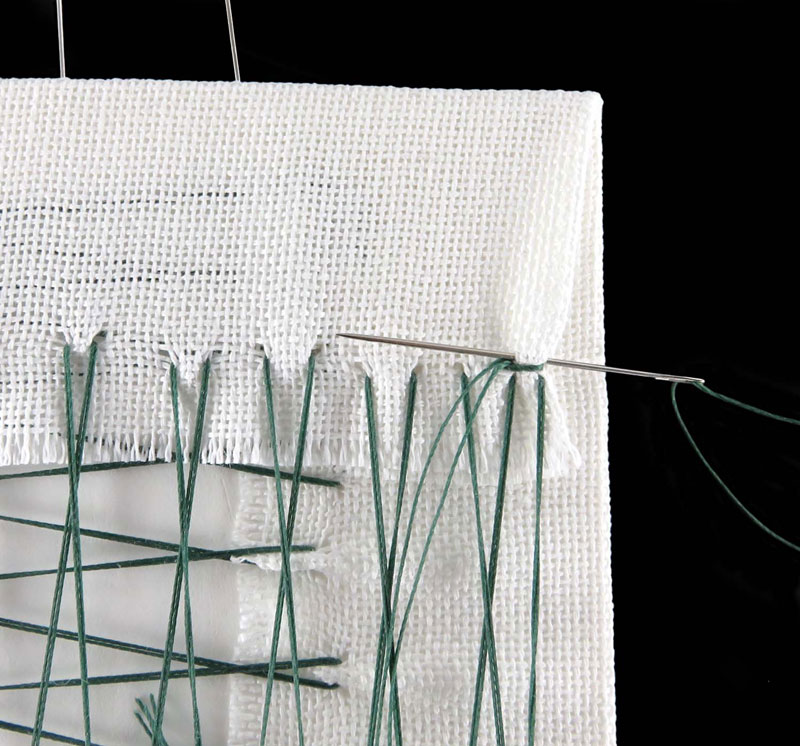
Work a final back stitch on top through all layers of the fabric.
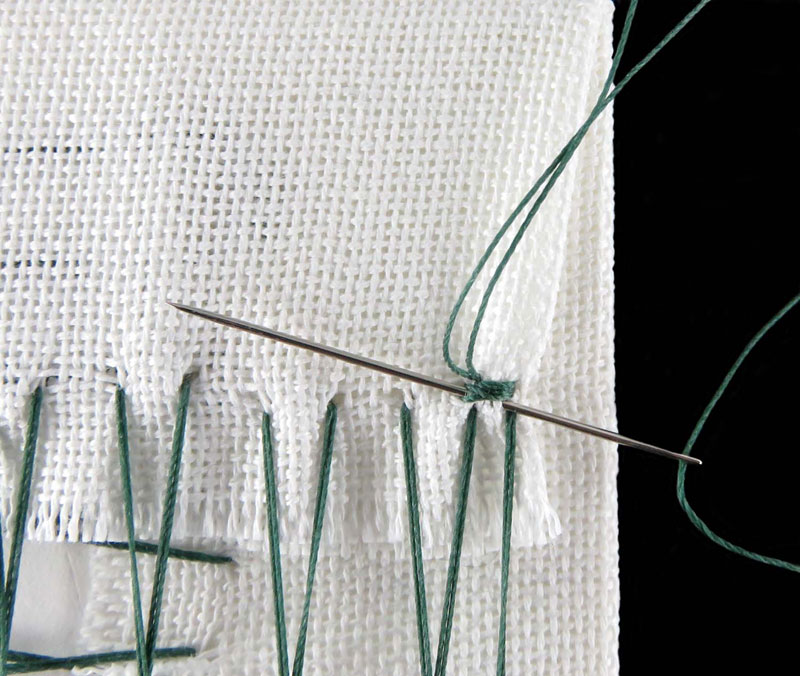
Cut the end of the thread.
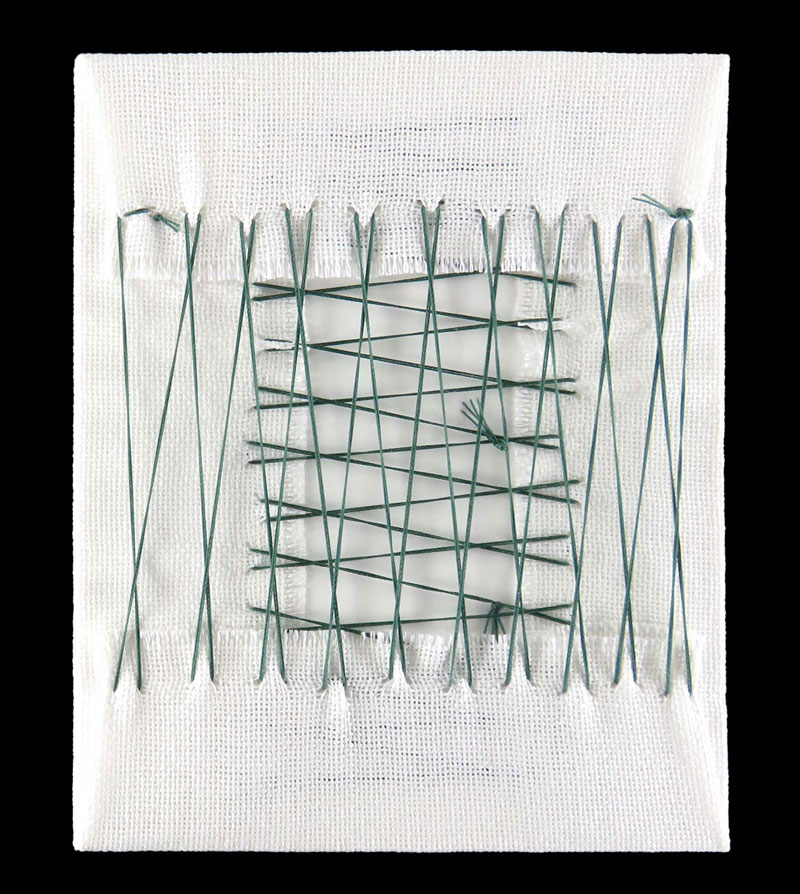
The needlework on the front of the board should be well positioned on the board without wrinkles or puckers.
Remove all foreign fibres and particles from the surface of the needlework with sticky tape just before putting the needlework into a frame for display as these can spoil the finished look of the needlework.
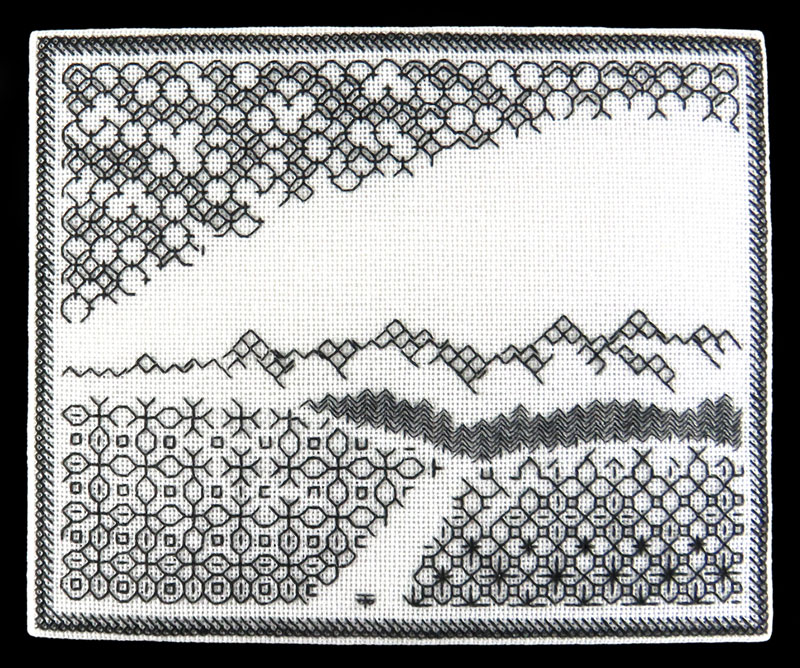
If the needlework is to be displayed in a hoop or mounted on a round board, the fabric is laced at the back so that the fabric on the front will stay tight without wrinkles or puckers. This method can also used on an oval shaped hoop or oval board.
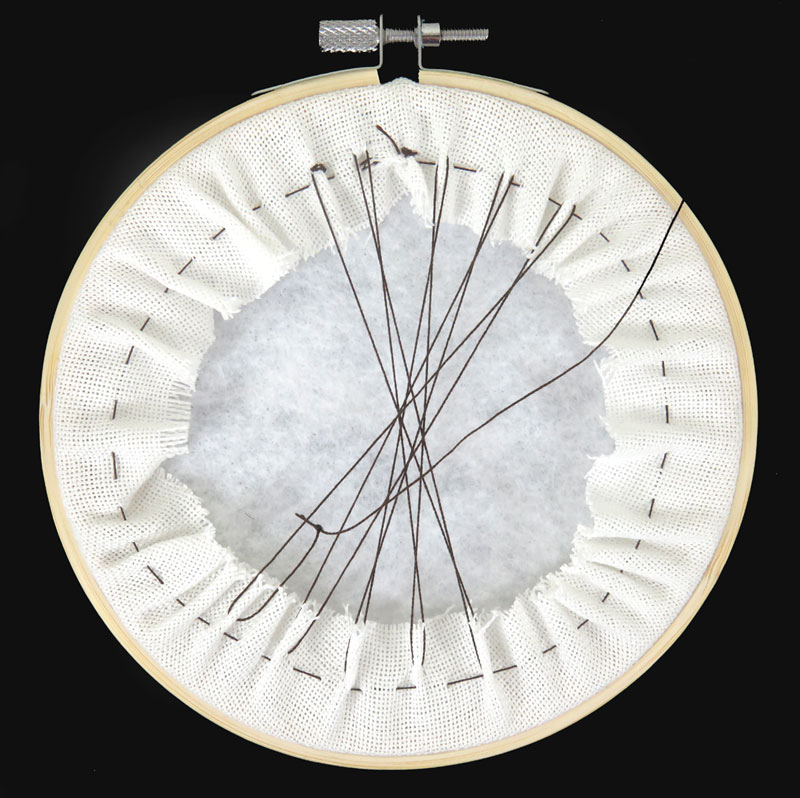
The example below shows the needlework in a 5 inch hoop that is pulled tight in the hoop so that there are no wrinkles or puckers in the fabric.
If you are putting the fabric onto a round board, position the needlework on to the board using dress makers pins.
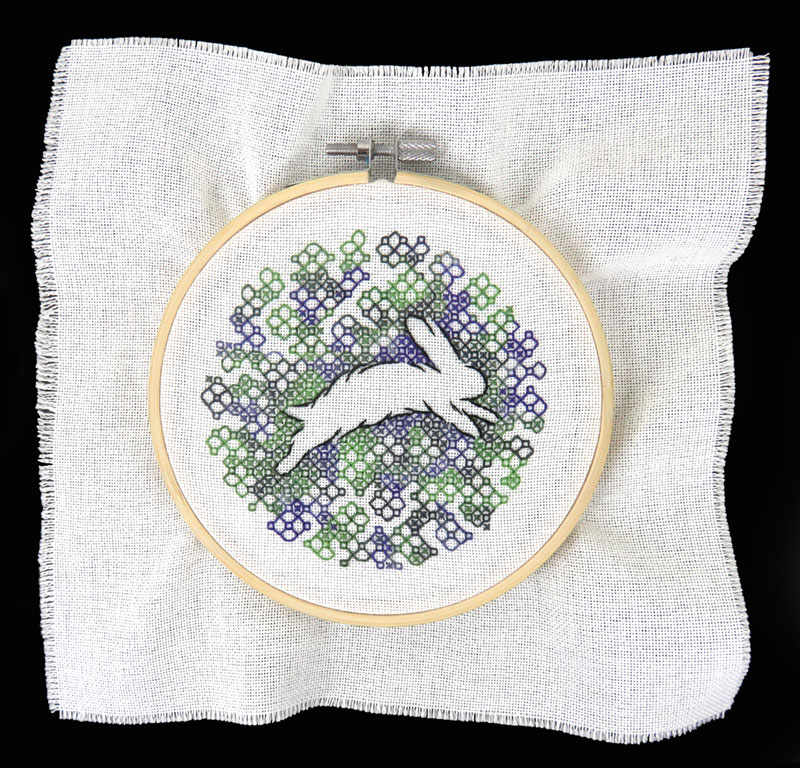
The fabric is 28 count lugana fabric which is a counted fabric (evenly spaced holes in the fabric). A round piece of white felt is placed behind the fabric at the back of the hoop so that the lacing stitches do not show through the holes of the fabric.
The excess fabric is cut away at the back around the hoop or board so there is a 1 inch to 3 inch border of fabric, depending on the size of your needlework and hoop.
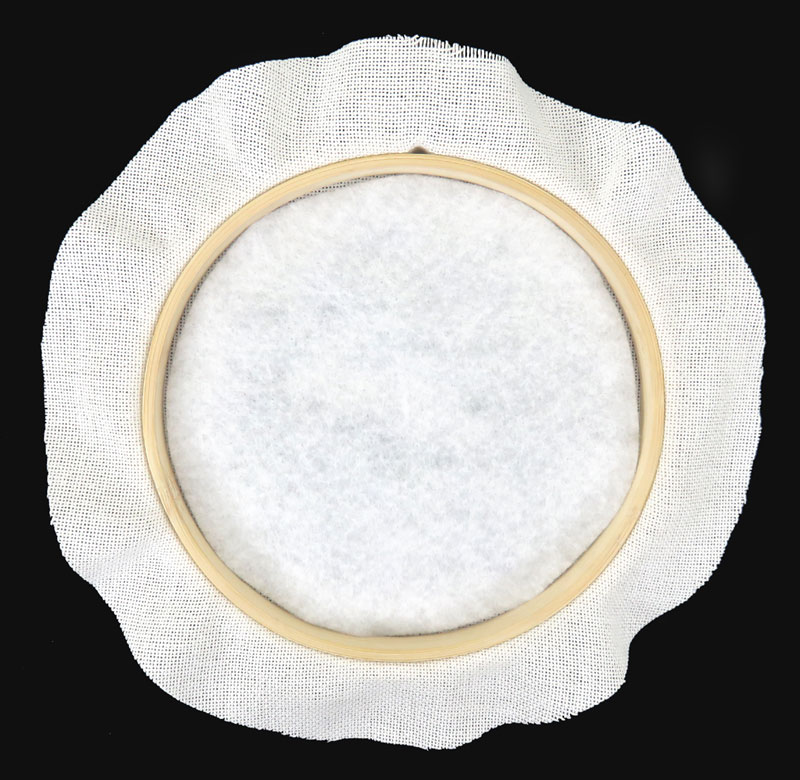
Use a long length of upholstery thread either single or double in a large sharp needle such as a Chenille needle. In the example below a single thread has been used.
Tie a knot in the end of the thread, work two back stitches in one location for a length of about 1/4 of an inch (6 mm) long to anchor the thread.
Pool the thread in the center when working the stitches so that it does not get caught on the edge of the fabric or dress making pins if you are mounting the needlework onto a round board.
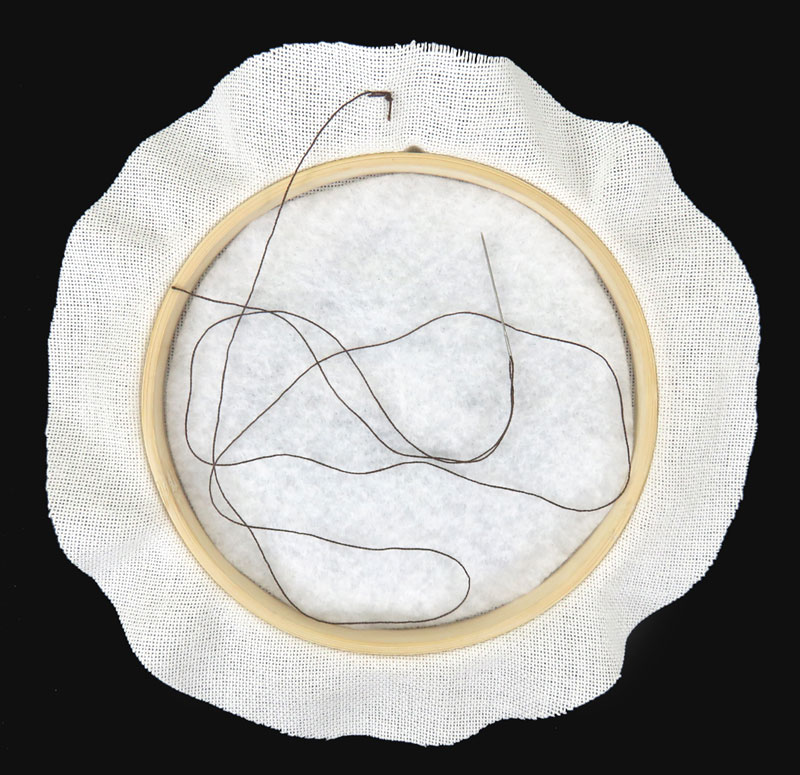
Work a line of running stitch around the border of fabric.
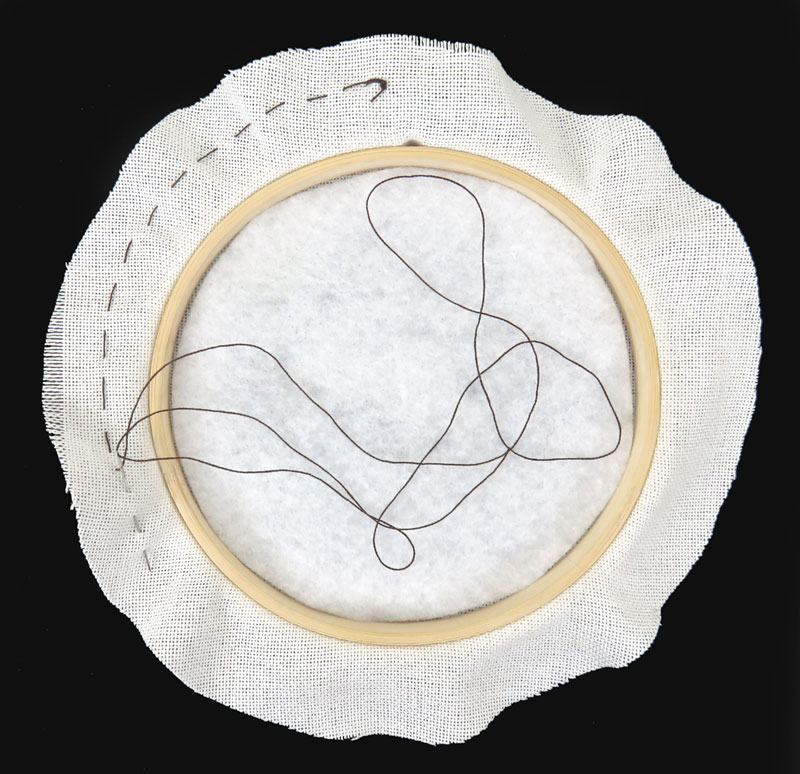
Two stitches at can be worked at a time. Each stitch can be about 1/4 of an inch (6 mm) long.
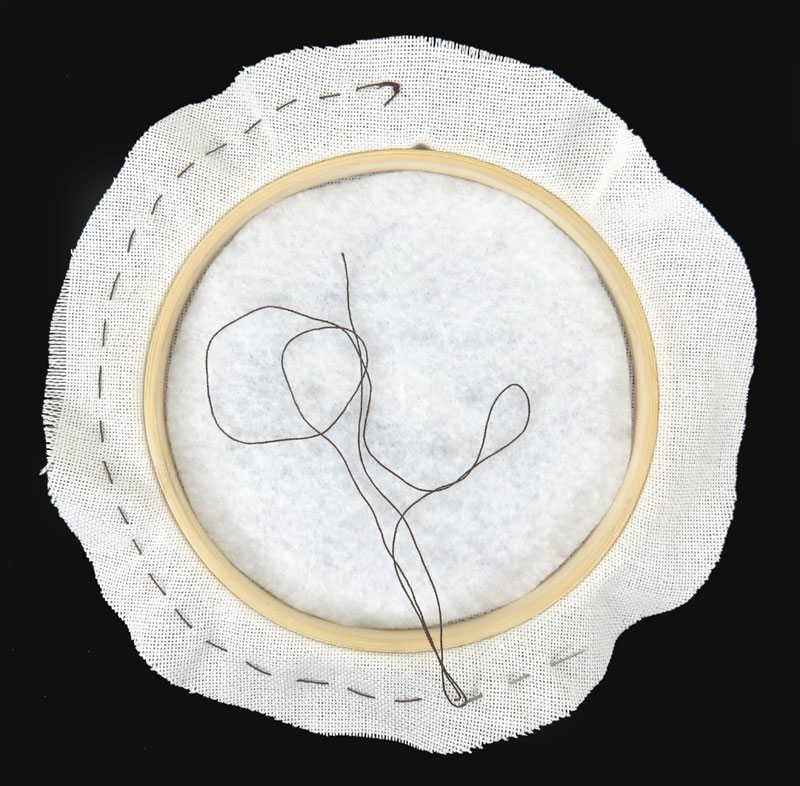
Work the running stitch to the starting anchoring stitches but do not finish the thread off.
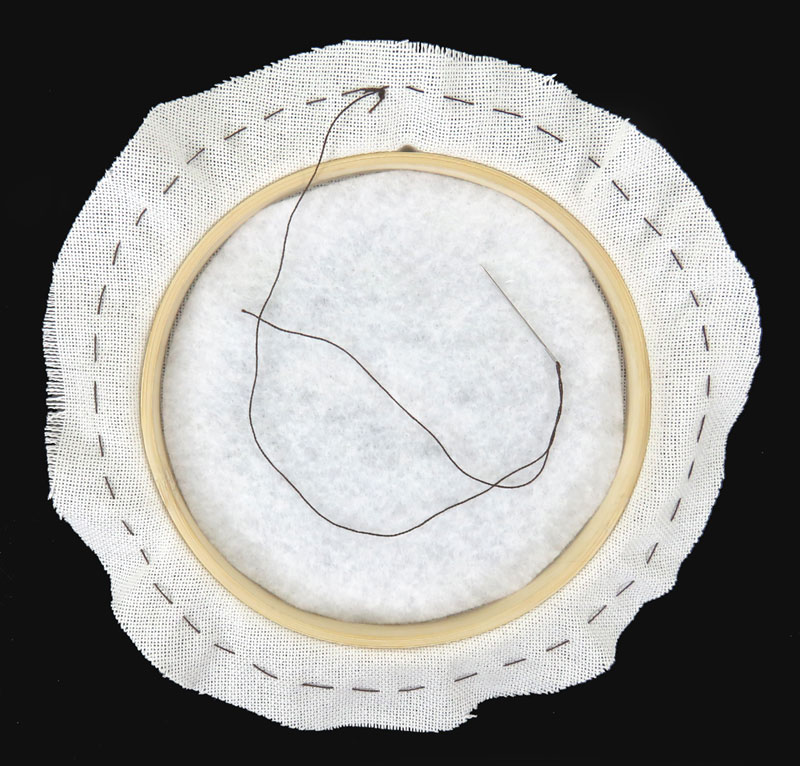
Pull the thread tight so that the fabric border gathers at the back of the hoop or round board and evenly spread out the gathers.
Work two or three back stitches to anchor the end of the thread and cut the thread.
The gathered border will make it easier to work the lacing stitches.
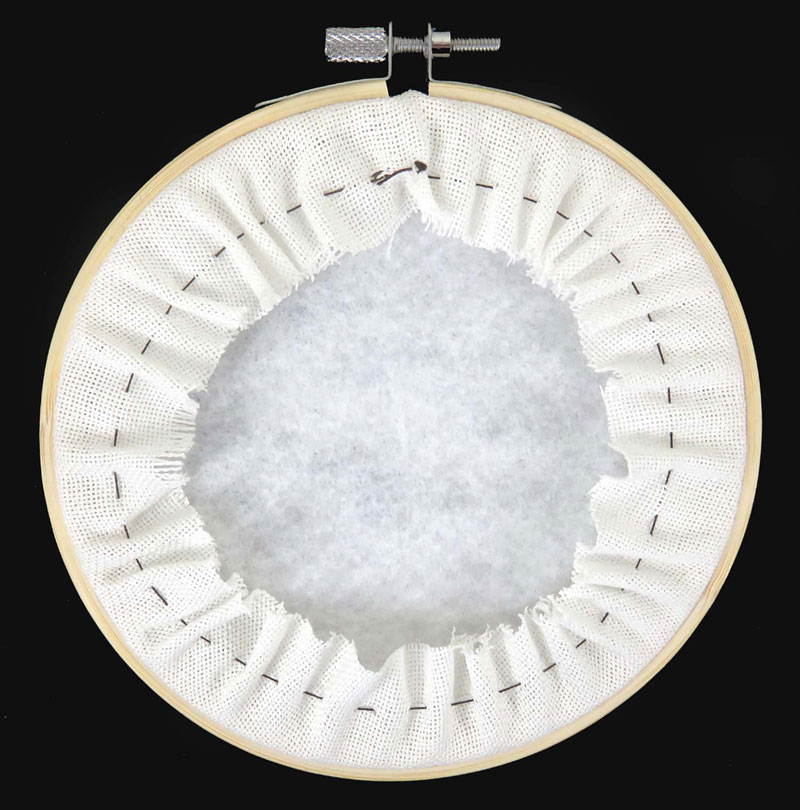
Start a new, very long length of strong thread with a knot in the end and two back stitches to anchor the thread for a length of about 1/4 of an inch (6 mm) long, close to the running stitch around the hoop.
Take the needle and thread diagonally across to the other side of the hoop and work a running stitch for a length of about 1/4 of an inch (6 mm) long, close to the running stitch around the hoop.
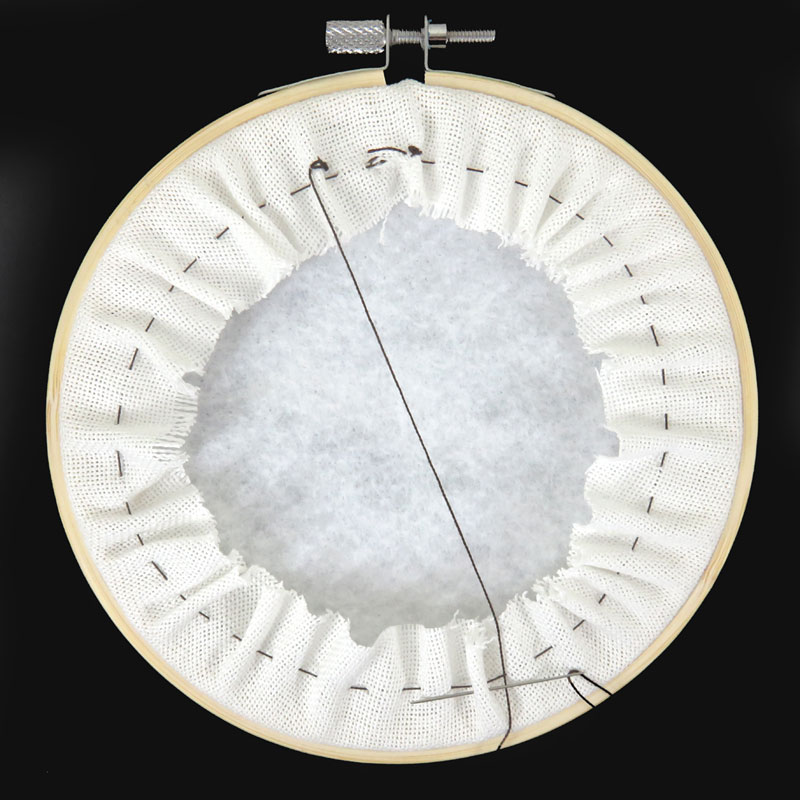
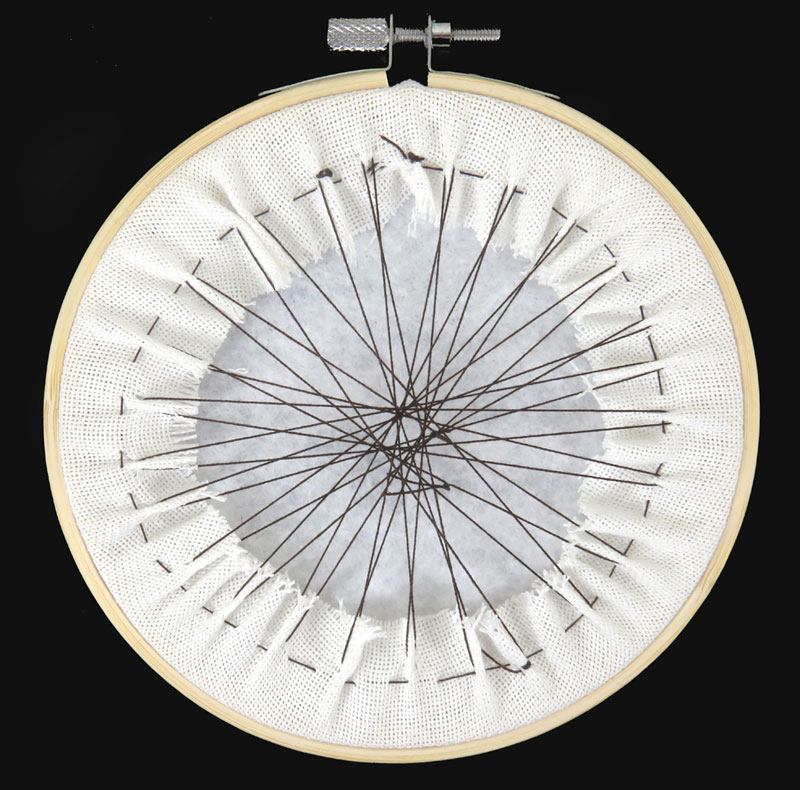
Take the needle and thread diagonally across the back of the work, crossing the first diagonal stitch and work a running stitch next to the right of the anchoring stitches so that the second diagonal stitch crosses the first diagonal.
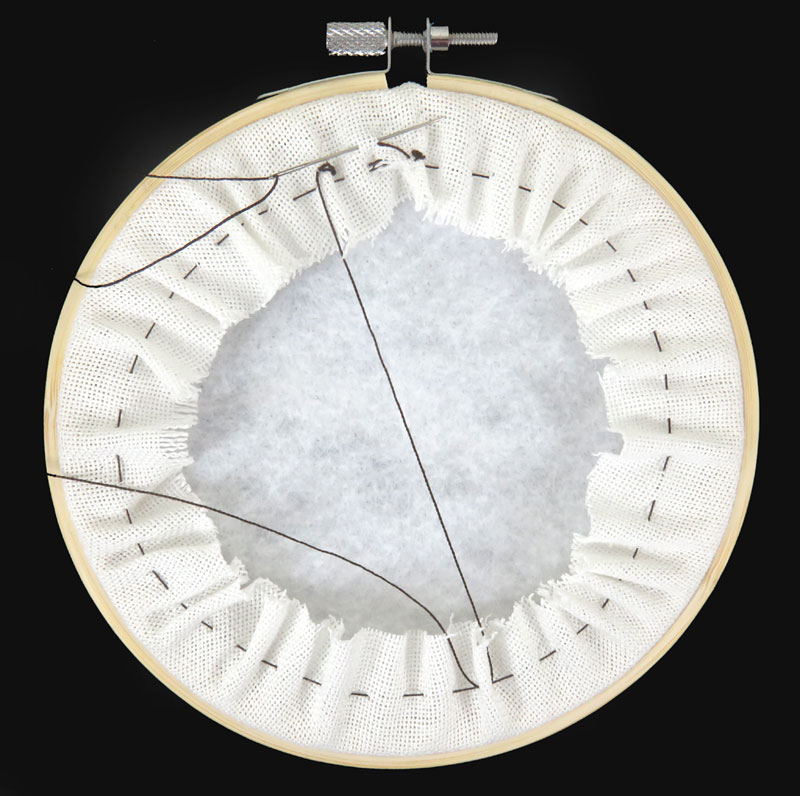
Take the needle and thread diagonally across the back of the work, crossing the first and second diagonal stitch and work a running stitch next to the previous running stitch to the left.
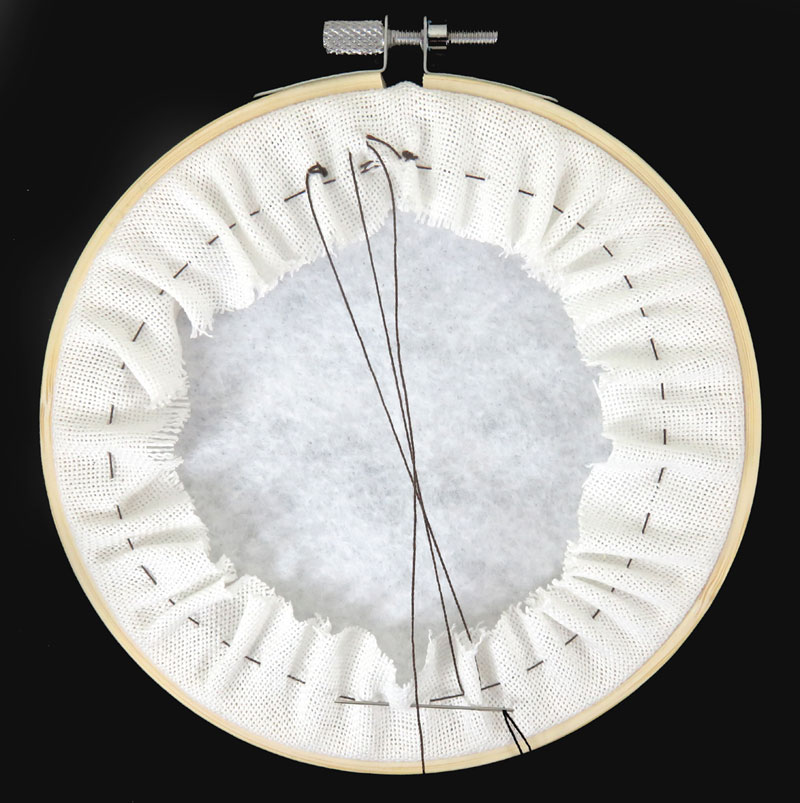
Repeat the process of working a diagonal stitch that crosses the previous stitches and then a running stitch, pulling the stitches very tight.
If you run out of thread add a new thread as as explained above.
When the entire area has been laced go back and tighten the stitches beginning with the first stitch and tightening the stitches around the circle to the last stitch so that the lacing stitches are tight like the strings of a guitar.
Finish the thread by working two or three back stitches in one location and then cut off the thread.
In the example below a piece of 4 ply acid free board has been cut which will be covered with a piece of black silk fabric that will become the back page of a needle case.

Optional: Glue a piece of batting (wadding) to the board if you would like the mounted needlework to have a padded feel. This is effective for the covers of needle cases or panels for boxes and if you have an uneven surface at the back of the fabric giving the surface a smoother/more even appearance.

Place the board onto the piece of fabric so there is a 1 inch border of fabric (minimum) around the outside of the board that will be glued to the back of the board.
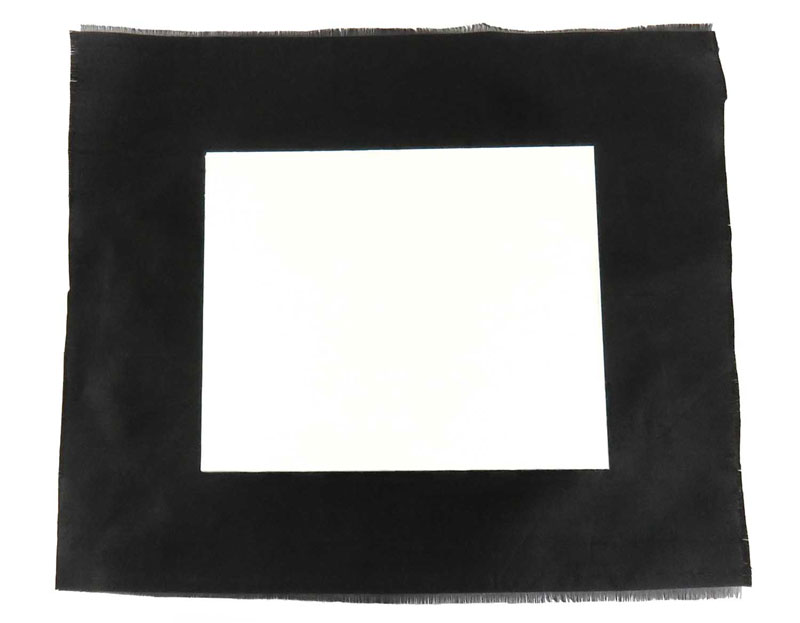
Place the board onto the piece of fabric so there is a 1 inch border of fabric (minimum) around the outside of the board that will be glued to the back of the board.
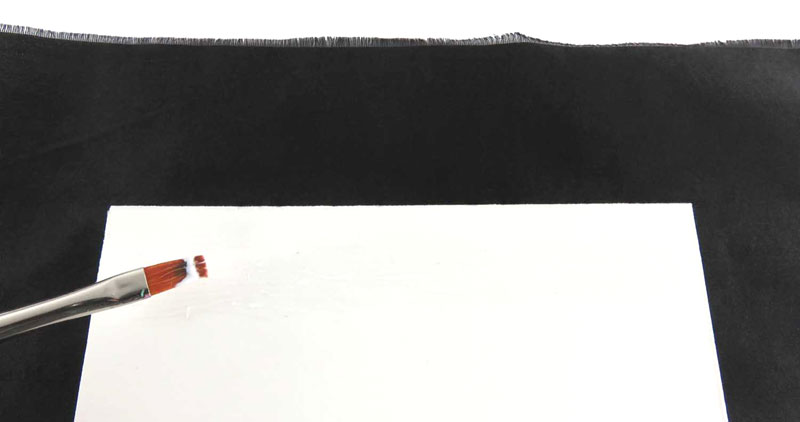
Glue down the opposite edge of fabric pulling the fabric firmly and evenly prior to positioning the fabric on the glued edge so there are no wrinkles or puckers in the fabric on the front side. Press down firmly and allow to dry.
Cut the fabric diagonally at the corner of the board.
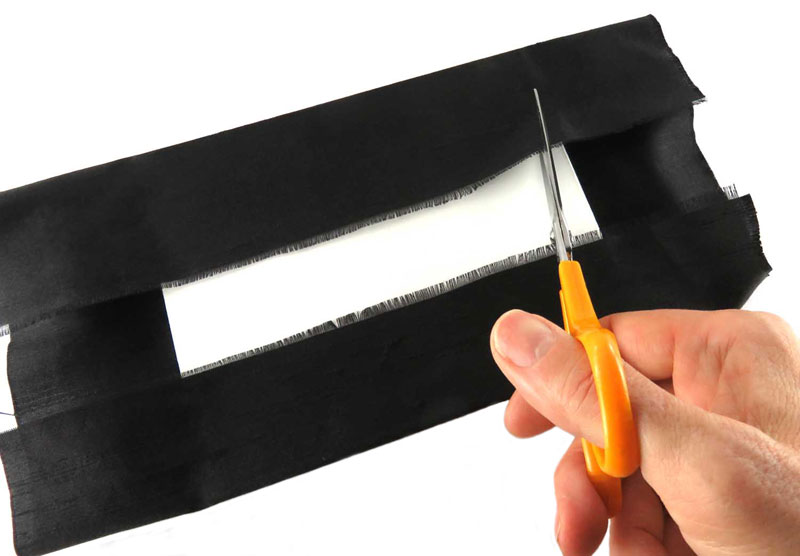
The picture below shows a diagonal cut in the fabric at each corner of the board.
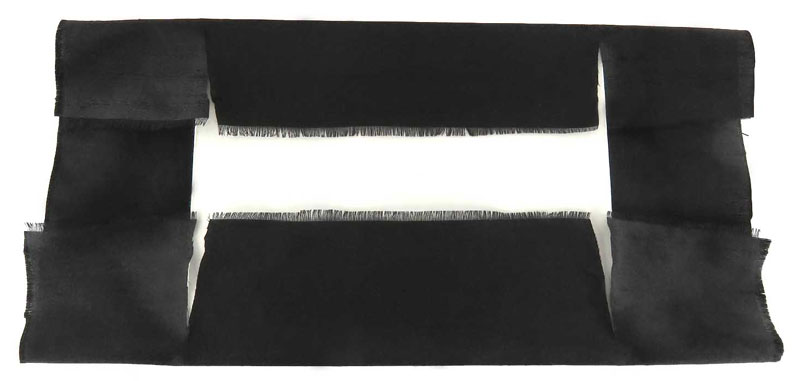
The picture below shows the second cut in the fabric at the corners of the board which removes a square of fabric at each corner.
Now it will be easier to get a flat fold on each of the corners of the board.
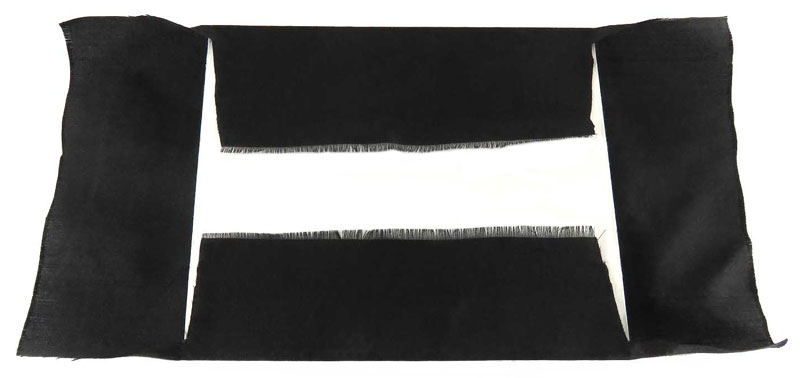
Turn the board as it is easier to glue the fabric down by pulling the fabric towards you. Spread a small layer of glue along the edge of the fabric using a paint brush or thin strip of card.
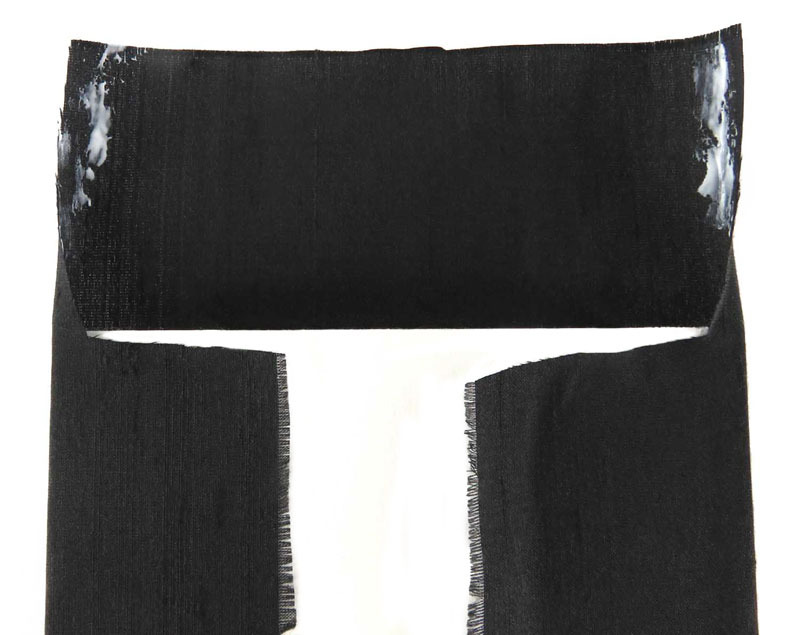
Fold over the edges of the fabric at the sides so that each side is glued at an angle.
Spread glue across the back of the board for the width of the fabric but leaving ¼ of an inch (6 mm) at the edge of the board with no glue on it, as the glue could seep through to the front of the fabric and show if the back of the board is not entirely covered to the edge.
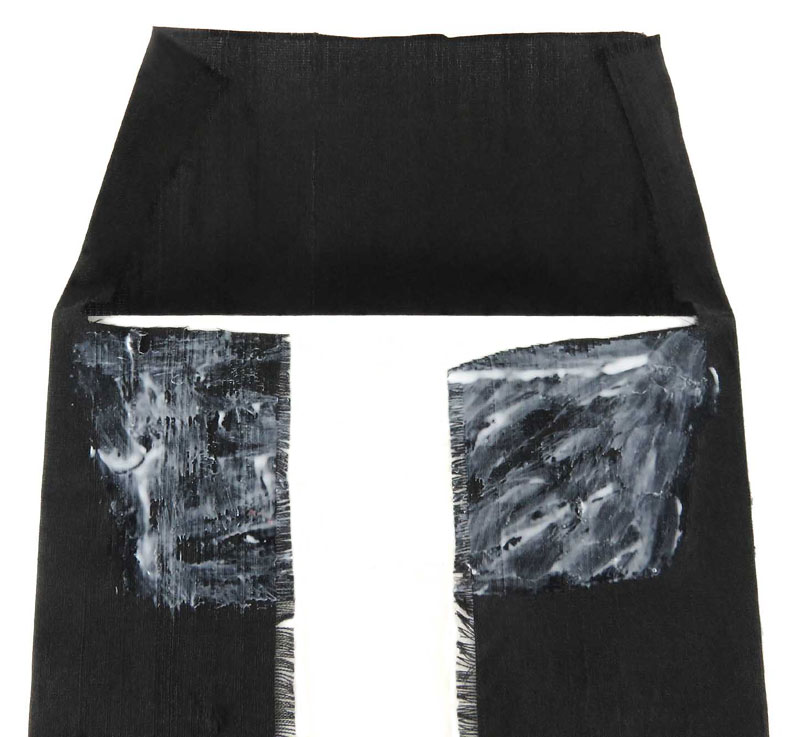
Fold the fabric onto the glue area, pulling the fabric firmly and evenly so that there are no puckers on the front of the board. Press the fabric firmly in place and allow to dry. If the folded edges stick up as there is not enough glue, spread a bit more glue to hold them down.
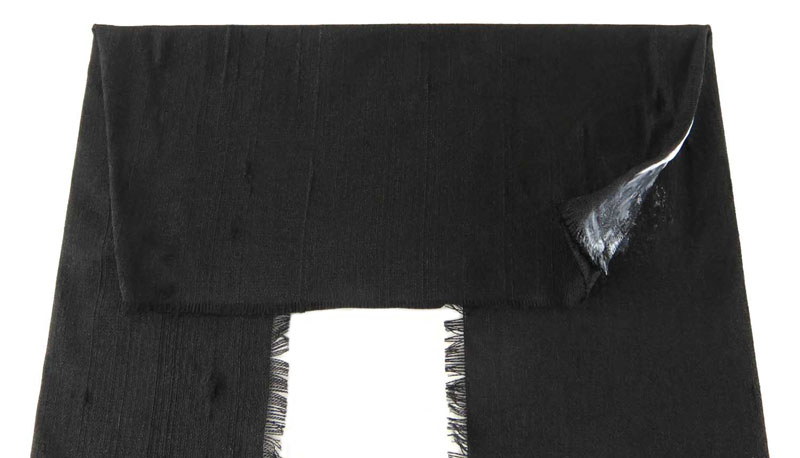
When the glue is dry, glue the opposite side, pulling the fabric evenly and firmly prior to positioning so there are no wrinkles or puckers on the front.
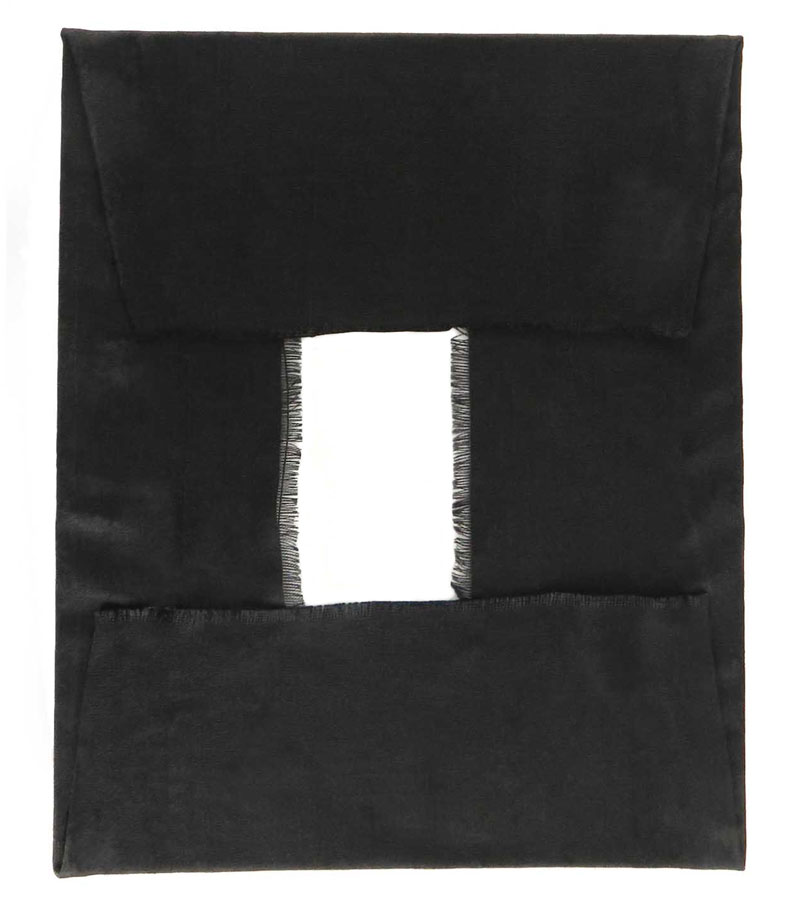
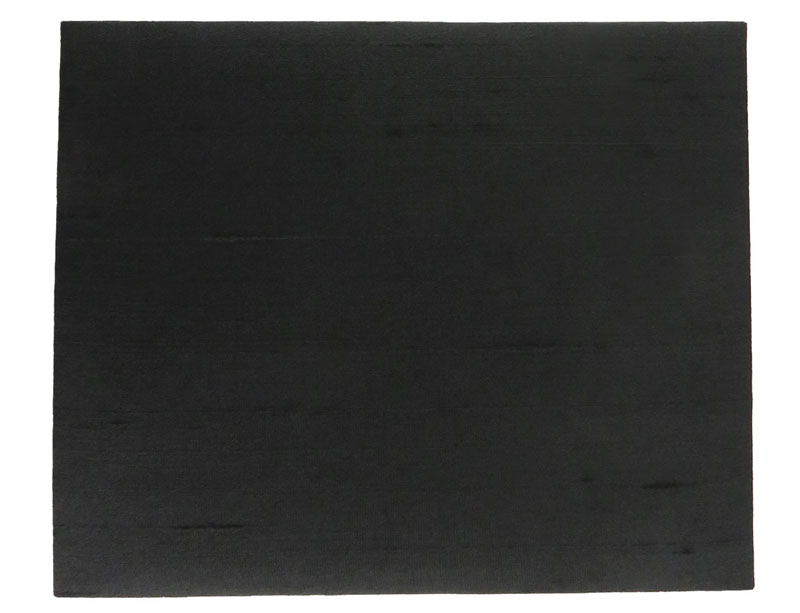
The picture below shows the front of the board covered with silk fabric, which will be used for the back page of a needle case.
