Embroidery Frames Information
Stretcher Bar Frames Information
Stretcher bars are inexpensive wooden embroidery frames in which the fabric can be pulled really tight. The end of the bars having teeth so that you can slot the bars together to form a square frame or rectangle frame.
Different length bars can be slotted together to match the size of your fabric. The fabric is pinned onto the bars using thumb tacks, pulling the fabric so that it is drum tight.
You can put a stretcher bar frame in most frame stands (check with the company first to see if the frame will fit the stand).
Thickness of the bars is 3/4 by 3/4 of an inch or 2 cm by 2 cm) or you can work at a table and support the corner of the frame with a heavy book, weight or a table clamp, you will then have your hands free to work your project.
Using the Right Size Stretcher Bar Frame
The sizes of my stretcher bars are standard manufacturers sizes. If you purchase a 12 inch by 12 inch stretcher bar frame, the outside dimensions of the frame are 12 inch by 12 inch. The bars themselves are 3/4 of an inch (2 cm) thick which means when the frame is assembled the inside opening of the frame will be 10 1/2 inch by 10 1/2 inch. My stretcher bars may not fit together with other manufacturers as the width of the teeth may be different so it is best to purchase at least one complete frame.
There are several points to consider when purchasing your frame:
- Its best to know what size the stitched area will be. If the finished stitched area is going to be 4 inch by 4 inch. You should have at least 4 inches of fabric around the stitched area on each side, making the fabric size 12 inch by 12 inch. An appropriate size stretcher bar frame will be 10 inch by 10 inch. With a 10 inch by 10 inch frame you have an opening of 8 1/2 inch by 8 1/2 inch which gives you 2 1/4 inches of open fabric around the stitched design. This is the minimum amount of open fabric that you want around the design for easy working.
- Do not work on a frame that is closer to the design as the tacks can mark the fabric with holes when pinning the fabric onto the frame, and these holes may be hard to cover when it comes to framing the piece.
- If you have a 14 inch by 14 inch piece of fabric the largest frame that you can use is a 14 inch by 14 inch frame as the outside dimensions of the frame are 14 inch by 14 inch. But my recommendation would be to use a 12 inch by 12 inch frame as then you have 2 inches of fabric around the edge to be able pull the fabric very tight onto the frame. You must work out the size of the actual stitched area to make sure that the frame will be okay. The largest stitched area size for a 14 inch stretcher bar frame (12 1/2 inch opening) would be 8 inch by 8 inch. This gives you 2 1/4 inches of open fabric around the design to comfortably stitch the piece.
- If you have a larger stretcher bar frame than your fabric, you can still use the stretcher bar frame but you will have to sew strips of fabric to the sides of your fabric to make the fabric large enough to pin onto the frame.
- In conclusion the frame size should be 2 inches smaller than the fabric size giving you 2 inches of fabric to pull the fabric tight on the frame. The inside opening of the frame should be 4 inches larger than the stitched area of the design enabling easy working.
If you have the right size frame it will not be necessary to re-position the fabric as you are working the embroidery as the whole design should be accessible to work.
Stretcher bar frames are a great frame to work my embroidery kits in as they are reasonably priced and quick to assemble. Most importantly once the fabric has been pinned onto the frame tightly the fabric should remain tight unless you press on the fabric as you are stitching, as this can cause the fabric to stretch and loosen in the frame.
It is important that the fabric is very tight for the Needle Painting kits, Modern Jacobean kits, Goldwork kits, Shadow Work kits and White Work kits as it is easier to work the embroidery on tight fabric and the stitching will work in neater.
I suggest using lots of thumb tacks to pin the fabric onto the frame as the closer the thumb tacks are together the more tension you will be able to get on the fabric (about 1/2 inch intervals).
How to Assemble a Frame and Pin on the Thumb Tacks
Assemble the stretcher bar frame so that it is square using four stretcher bars. You can use all the same length bars to create a square frame or each pair can be a different size i.e. using a 9 inch pair of stretcher bars and a 11 inch pair of stretcher bars to form a rectangle frame. The bars on opposite sides should always be the same length so that the frame does not become warped.
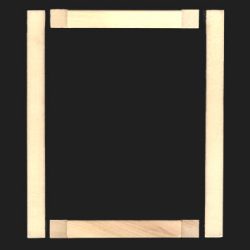
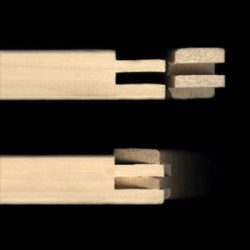
The stretcher bars have teeth at both ends of the bar, these teeth slot into the teeth of the other bars to form a frame, you may require a hammer to help push the bars together.
Place the fabric over the stretcher bar frame so that the fabric is squarely placed on the frame, not overlapping one edge more than an other and not askew. If you are using a supporting fabric you can place this over the frame underneath the ground fabric.
Pin the first side of the fabric onto the frame starting at the center of one side of the stretcher bars, I like to pin the fabric on the side of the bars so that when you are working the embroidery the embroidery thread is less likely to get caught on the thumb tacks.
Pin the fabric from the center of the bar to the outside edge, then pin the other side of the fabric from the center out. Push the tacks in about 1/2 an inch apart and try to avoid having puckers in the fabric between each tack – you can gently pull the fabric to the side as you are pushing the pins in. If you are using a ground fabric, pin both fabrics to the frame at the same time and at the same tension.
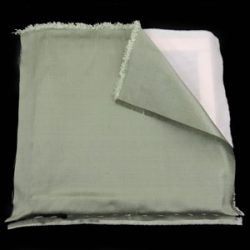
Pin the second side on the opposite side of the first side. Also begin pinning the fabric at the center of the bar, pinning one side and then the other. This time pull the fabric as tight as you can, it is important that the fabric is very tight for working my embroidery designs as you will get better stitch tension. Do not worry about ripping the fabric as the fabrics I provide are strong.
If you are using a ground fabric, pull the ground fabric tight first and then the silk fabric then hold the two fabrics tight together and push the thumb tack in.
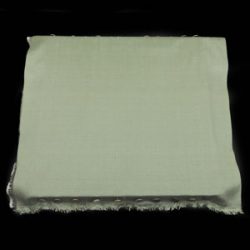
Pin the third side of one of the unpinned edge, pin the fabric in the same method as the first side, it is not necessary to pull the fabric very tight, just pull the fabric gently.
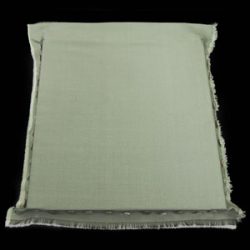
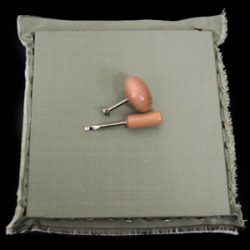
If you have trouble pushing the thumb tacks into the frame you can use a tool made specifically for this. A thumb tack is placed on the end of the magnetic pusher and and there is a comfortable wooden handle to push the tack into the frame.
You do not have to push the thumb tacks in flush with the wood as it will be hard to take them out later. Push the thumb tacks far enough in so that the thumb tacks do not fall out. Your embroidery thread will likely catch on the thumb tacks sometimes when stitching but I have a solution for this, please see further down the page.
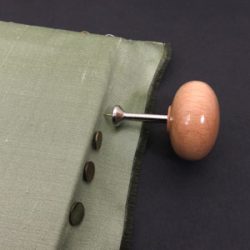
If you need to remove thumb tacks to tighten the fabric, you can use the thumb tack extractor.
The packet of brass thumb tacks comes with a handy little plastic tack remover, and the Corjac Tack Kit comes with the thumb tacks, wood handle pusher, and wood handle extractor which is nice and sturdy for the job.
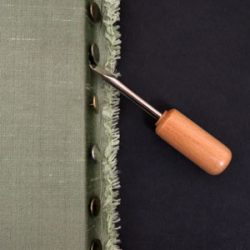
The fourth side is worked in the same method as the second side pulling the fabric as tight as you can. When the fabric is pinned onto the frame, the fabric should be drum tight i.e. when you flick the fabric with your finger it pings like a drum.
For instance the picture opposite shows two tools on the fabric and the fabric remains taught. The fabric should not be soft and spongy to the touch as this would be not tight enough.
The tighter the fabric the more even your stitches will lay.
A great method to stop the fabric from fraying and to stop the thread from catching on the thumb tacks and to keep the edge of the fabric clean is to wrap an elasticated bandage around the edge of the frame.
Start at any position on the side of the frame, place a thumb tack at the end of the bandage and into the frame to hold the end of the bandage in place.
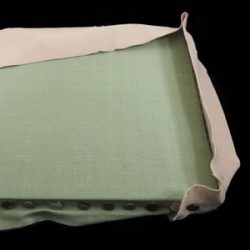
Wrap the bandage tightly around the frame so that it will not slide of the sides and place one or two thumb tacks at the end of the bandage into the frame to hold the bandage in place.
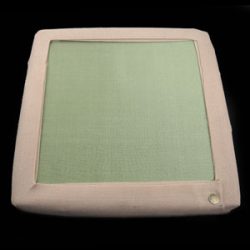
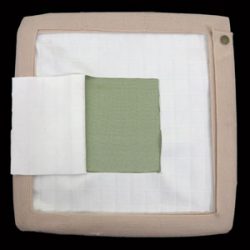
You can keep your fabric clean by covering the frame with either a white sheet or piece of clear plastic the size of the frame. Tuck the edges of the covering under the bandage. You can cut out a three sided window flap at the center of the fabric for the size of the design, fold the flap back so you can work on the embroidery.
The surrounding fabric is covered with the sheet or plastic keeping the fabric clean. You can fold the flap back over the embroidery when you are not working on it to keep the embroidery clean.
