Mounting Embroideries
Mounting Needlework Ready for Framing
I now have a Mounting Needlework Ready for Framing PDF File that you can download which has the information and pictures that you see on this webpage in an easy to print format.
I prefer to mount the embroidery myself onto acid free board ready for framing rather than have a framer do this for me so I can ensure that the work is mounted properly.
The other benefit of mounting your own embroidery is it is more cost effective as you can purchase pre-made frames from a craft store. A lot of my designs that I sell fit well in 8 inch by 10 inch pre-made frames.
The following things are important to consider when mounting an embroidery:
- The embroidery is mounted onto acid free board. The board should be acid free through the entire board as the acid in regular board can leach into the embroidered fabric and rot it over time.
- The best method is to lace the embroidery onto the board. If the embroidery is glued, or stapled or pinned onto the board the glue could damage the fabric and the staples or pins could rust and damage the fabric and it is also hard to get the fabric tight on the board. If the fabric is not laced it could loosen over time and puckers can show in the fabric at the front of the work.
- When the fabric is mounted onto the board it is important that fabric has all foreign fibers removed from the front and the back of the embroidery as these can spoil the finished look of the embroidery. You can use sticky tape to remove fibers
- It is important the embroidery is mounted so it is not askew and is tight on the board for a professional look.
Requirements
- Acid Free Board: The type I use is 8 ply which is thick acid free board through the whole core not just the surface. If you cannot get 8 ply then you can use 4 ply acid free board, you can glue two pieces of acid free board together to make it thicker which also makes it easier to pin the fabric onto the board. Some framers and art stores will sell 8 ply or 4 ply acid free board. There is also acid free foam core which can be purchase from art and craft stores. It is not as easy to pull the fabric tight on foam core as the board can bow but it is good when there is no other board available.
- Utility Knife: Knife to cut the acid free board.
- Strong Thread: Such as upholstery thread for lacing the embroidery.
- Dress making pins with large heads: To position the fabric onto the frame.
- Needle: Large with sharp point such as a chenille needle.
- Scissors
Method
Measure the opening at the back of the frame and cut the acid free board 1/8th of an inch (4 mm) smaller. For instance if you have an 8 inch by 10 inch frame then you can cut the acid free board 7 7/8 by 9 7/8 inches, this allows a little room for the fabric that is wrapped around the edge of the board.
Place the board into the back of the frame to make sure it is not too big or too small.
Place the embroidery over the board making sure that the embroidery is in the center. Measure from the sides of the actual embroidery to the sides of the board, the fabric showing at the sides of the embroidery should be the same measurement.
Also measure from the top and the bottom of the actual embroidery to the edge of the board, the fabric showing at the top and the bottom of the embroidery should be the same measurement but it does not have to be the same measurement as the sides of the embroidery.
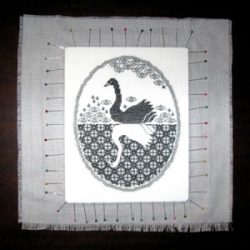
Using dress making pins with large heads pin the fabric to the edge of the board so that the fabric is central. When pinning on the fabric start on one side at the center and pin out to the corners. Then do the same for the opposite side pulling fabric tight. Do the same for the other two sides. Check the measurements again, if one side has a wider fabric edge then re-pin the side taking one pin out at a time, pulling the fabric and repining it. Continue checking the position of the embroidery repining the fabric on the board so that it is very tight and centered, with no puckers and so the design is not askew on the board. Once the embroidery is pinned in place, hold the frame over the embroidery to check that the design fits nicely in the frame.
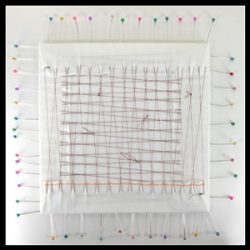
Lace the fabric to the back of the board using a very strong upholstery thread. It is easiest to use the thread single so the thread should be strong enough that you cannot snap it with your hands. Use a needle with a sharp point and long shaft so it is easy to hold such as a chenille needle. Cut a very long piece of the upholstery thread, about 1 yard or 1 meter long and thread one end into the needle and knot the other end. Fold one side of the fabric to the back of the board (I usually do the wider side of the board first) and start the thread in the fabric on one side of the board. Work about three back stitches in one spot about 1/4 of an inch or 6 mm long to anchor the thread.
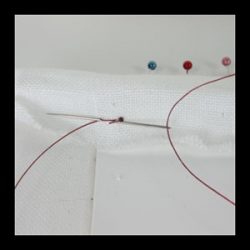
Take the needle across the board to the fabric strip on the other side of the board and do a back stitch through the fabric for a length of about 1/4 of an inch or 6 mm long.
Pool the thread at the center of the board so that it is less likely to catch on the dress makers pins.
If you are using a ground fabric, pin both fabrics to the frame at the same time.
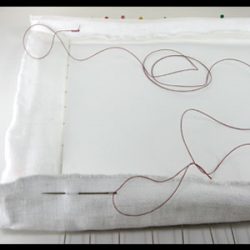
Take the needle and thread back to the opposite side and work another back stitch about 1/4 of an inch to 1/2 and inch (6 mm to 12 mm) to the right of the previous stitch.
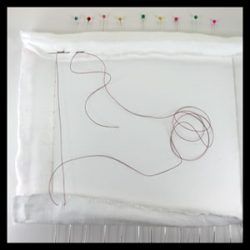
Continue switching back and forth from one side of the board to the other side of board working a back stitch through the fabric. The back stitches do not all have to be worked at the same height, it is better to vary the positioning of the stitches so that there is not excessive pulling on one thread of the fabric. When the thread is crossed over the previous stitch a herringbone effect is created. Pull the stitches very tight as you are working. When you start running out of thread, go back to the first stitch and pull the stitch and consecutive stitches tight pulling up any slack, you will find you will have more thread to work with.
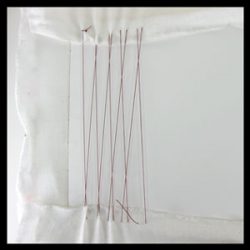
If you run out of thread as you are working across the board, do not finish the thread off, instead cut a new length of thread and tie the new thread to the end of the old thread with a couple of secure knots. Thread the other end of the new thread into the needle and continue working the herringbone stitch.
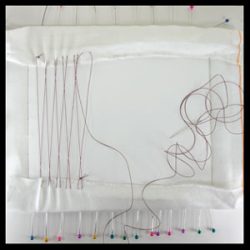
You may have to start a new thread several times using this method, always pull the stitches tight before knotting the old and new thread together.
The herringbone stitches on the back of the work should be very tight like guitar strings. When one side has been stitched then finish the thread with several back stitches in one spot and cut the thread.
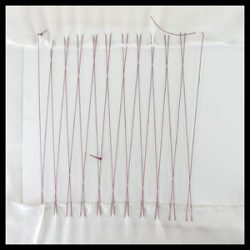
Fold the fabric edges on the other two sides of the board flat to the board and make a nice turn at the corners.
Work two back stitches through all the layers of fabric at one corner of the board.
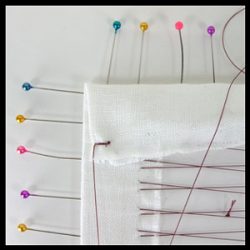
Work herringbone stitch across the board so that you have a second lay of herringbone stitch covering the first layer of herringbone stitch but in the opposite direction. Pull the herringbone/lacing stitches very tight.
You can take out the pins as you work the herringbone stitch if you find that your thread is catching on the pins.
Finish off the thread with two back stitches through all layers of fabric.
